IVAR Project
Filipa Magalhães
This website was built to document the process and making of the
Interaction in Virtual and Augmented Reality 2024/2025 project.


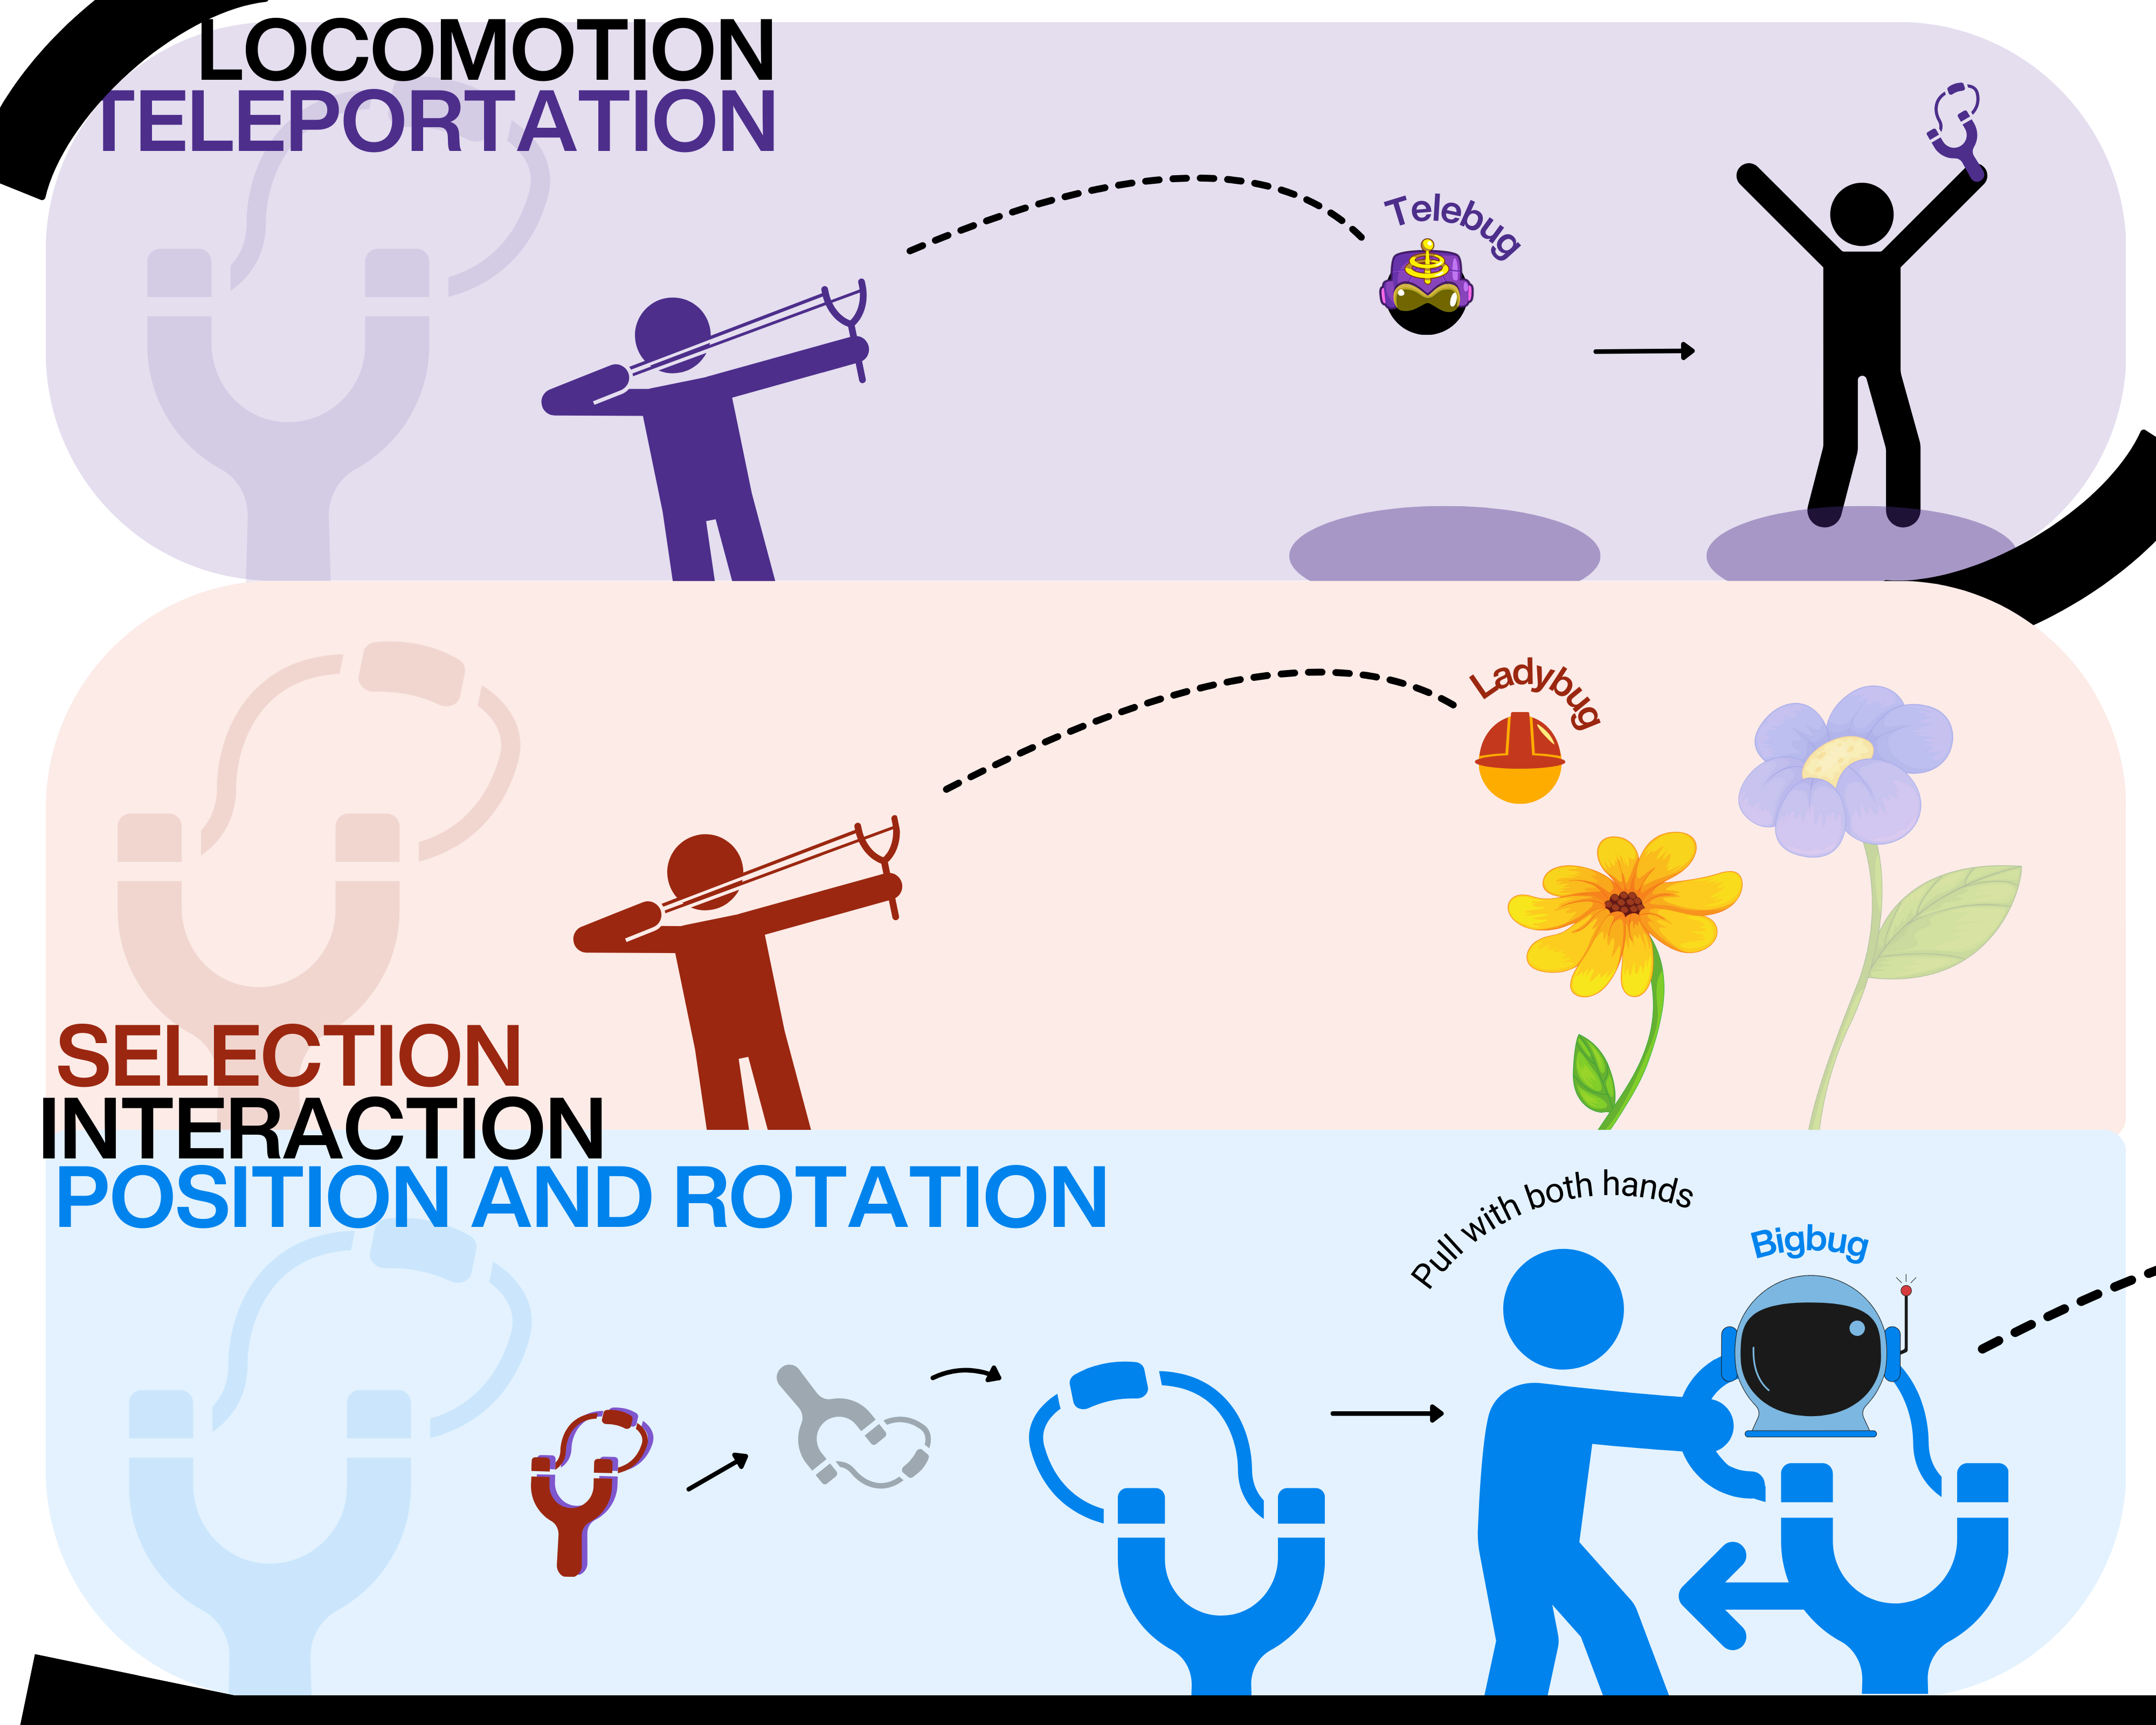
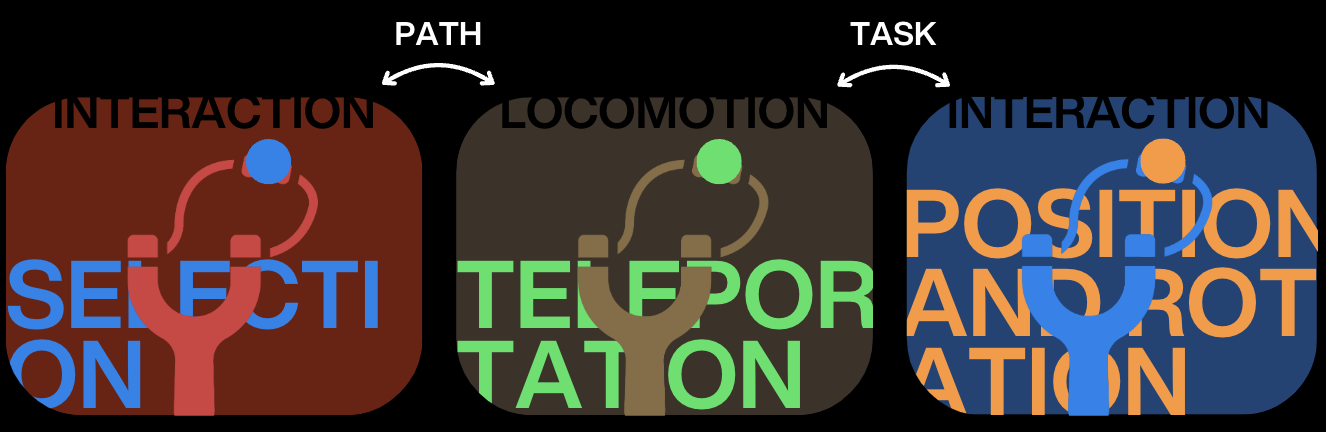
This project aims to explore the features of VR by developing the first VR game experience, focusing specifically on two key tasks:
1) Locomotion technique – enabling the player to navigate through the environment;
2) Interaction technique – allowing the player to both select and adjust the position and rotation of objects.
To achieve this, a base virtual parkour challenge was provided, featuring a simple locomotion technique where the player grabs the air to move around. The environment includes coins for object selection interactions and specific tasks for manipulating objects. The goal is then to modify and adapt these techniques to create our own unique approaches, immersing players in a dynamic and engaging VR experience. The following section goes deeper into the details of the parkour challenge.
Parkour Challenge
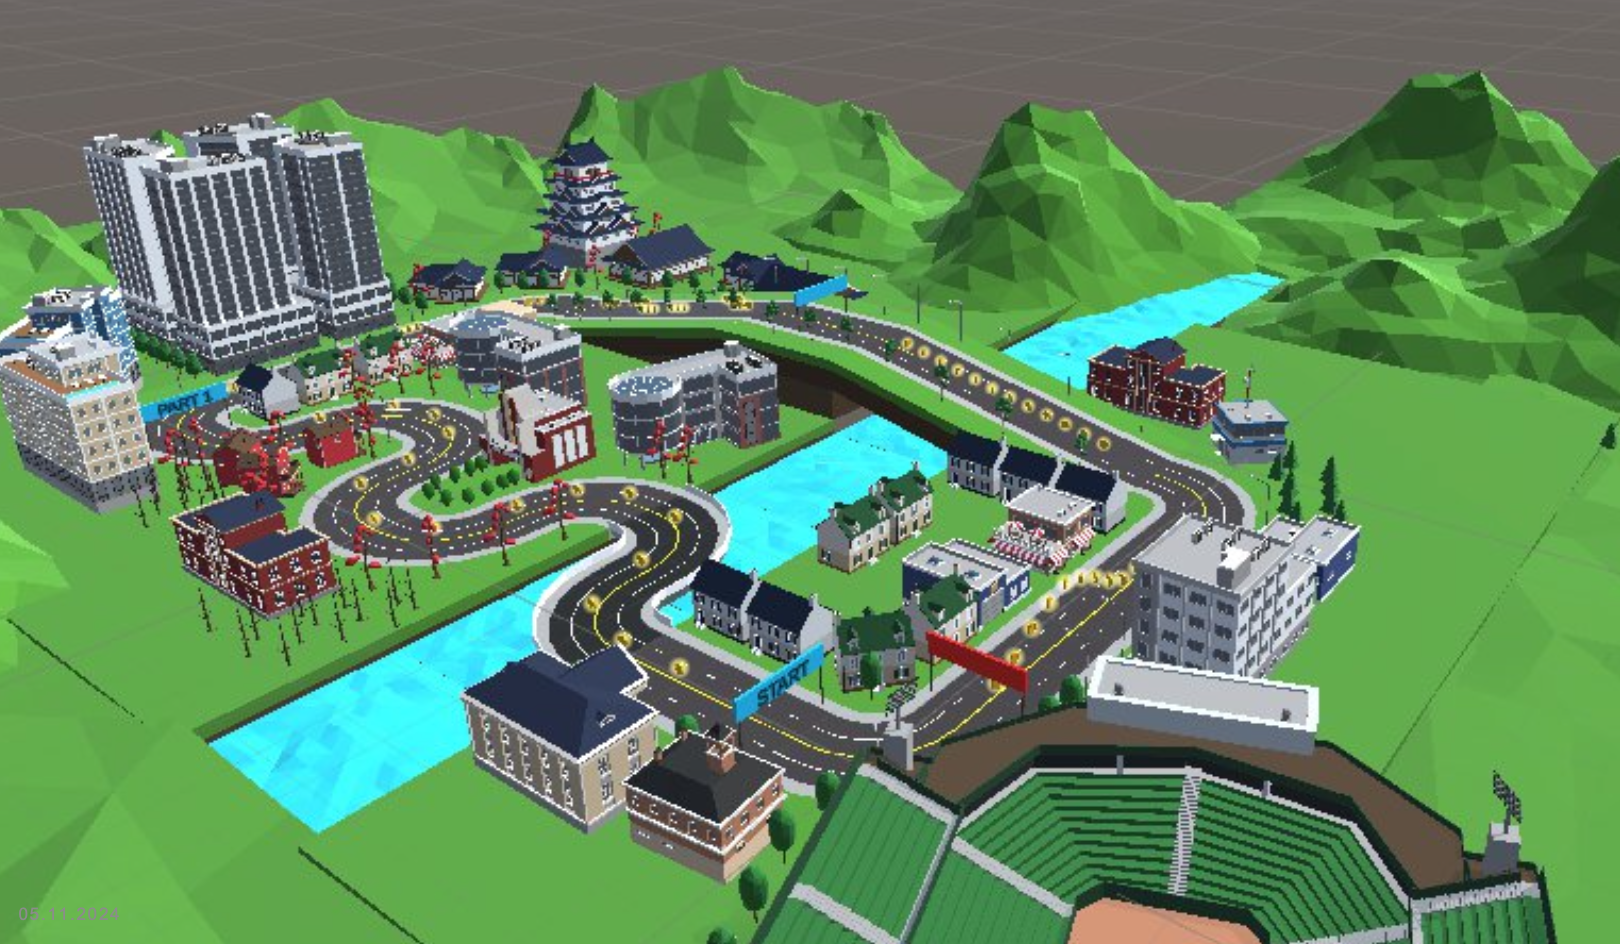
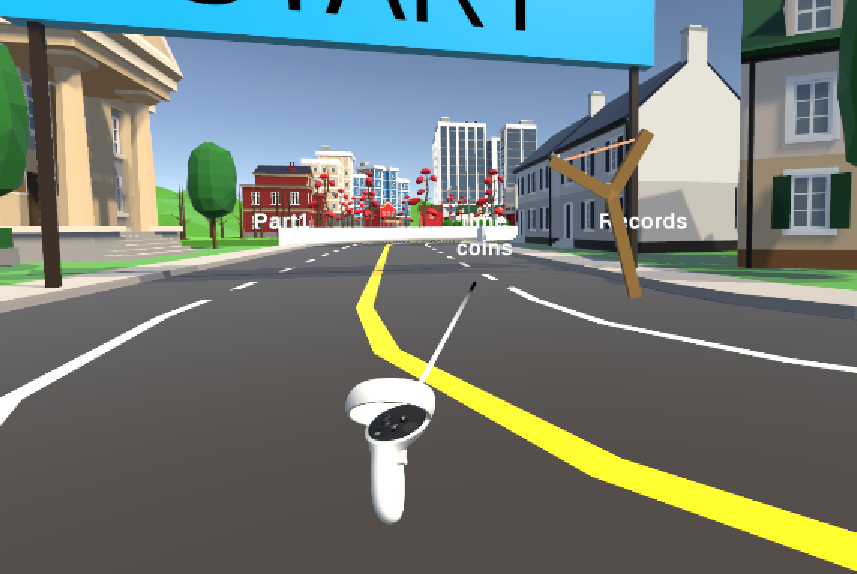
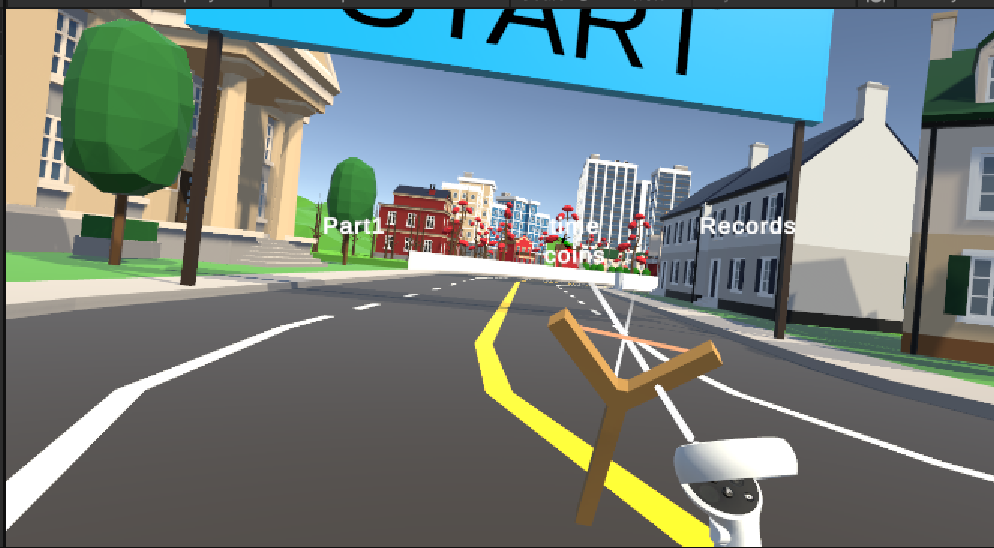
As illustrated below, the parkour challenge takes place in a mountainous village with three distinct paths, each separated and triggered by a banner. Each path presents a unique challenge: 1) continuous curves; 2) zig-zagging uphill; 3) final sprint.
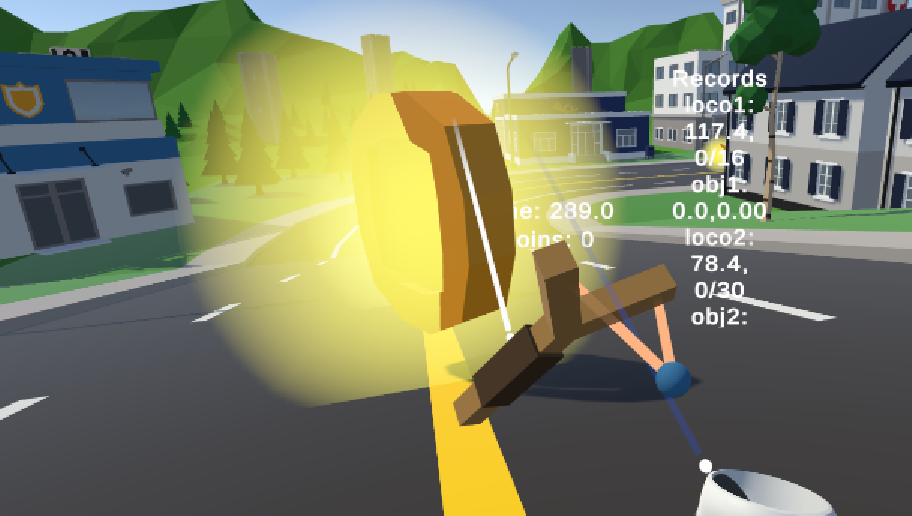
Along the way, players can collect coins placed throughout the course. Before reaching each banner, they must complete an object interaction task. Upon completing the parkour, the screen displays performance records, including the time taken and the number of coins collected for each section and in total.

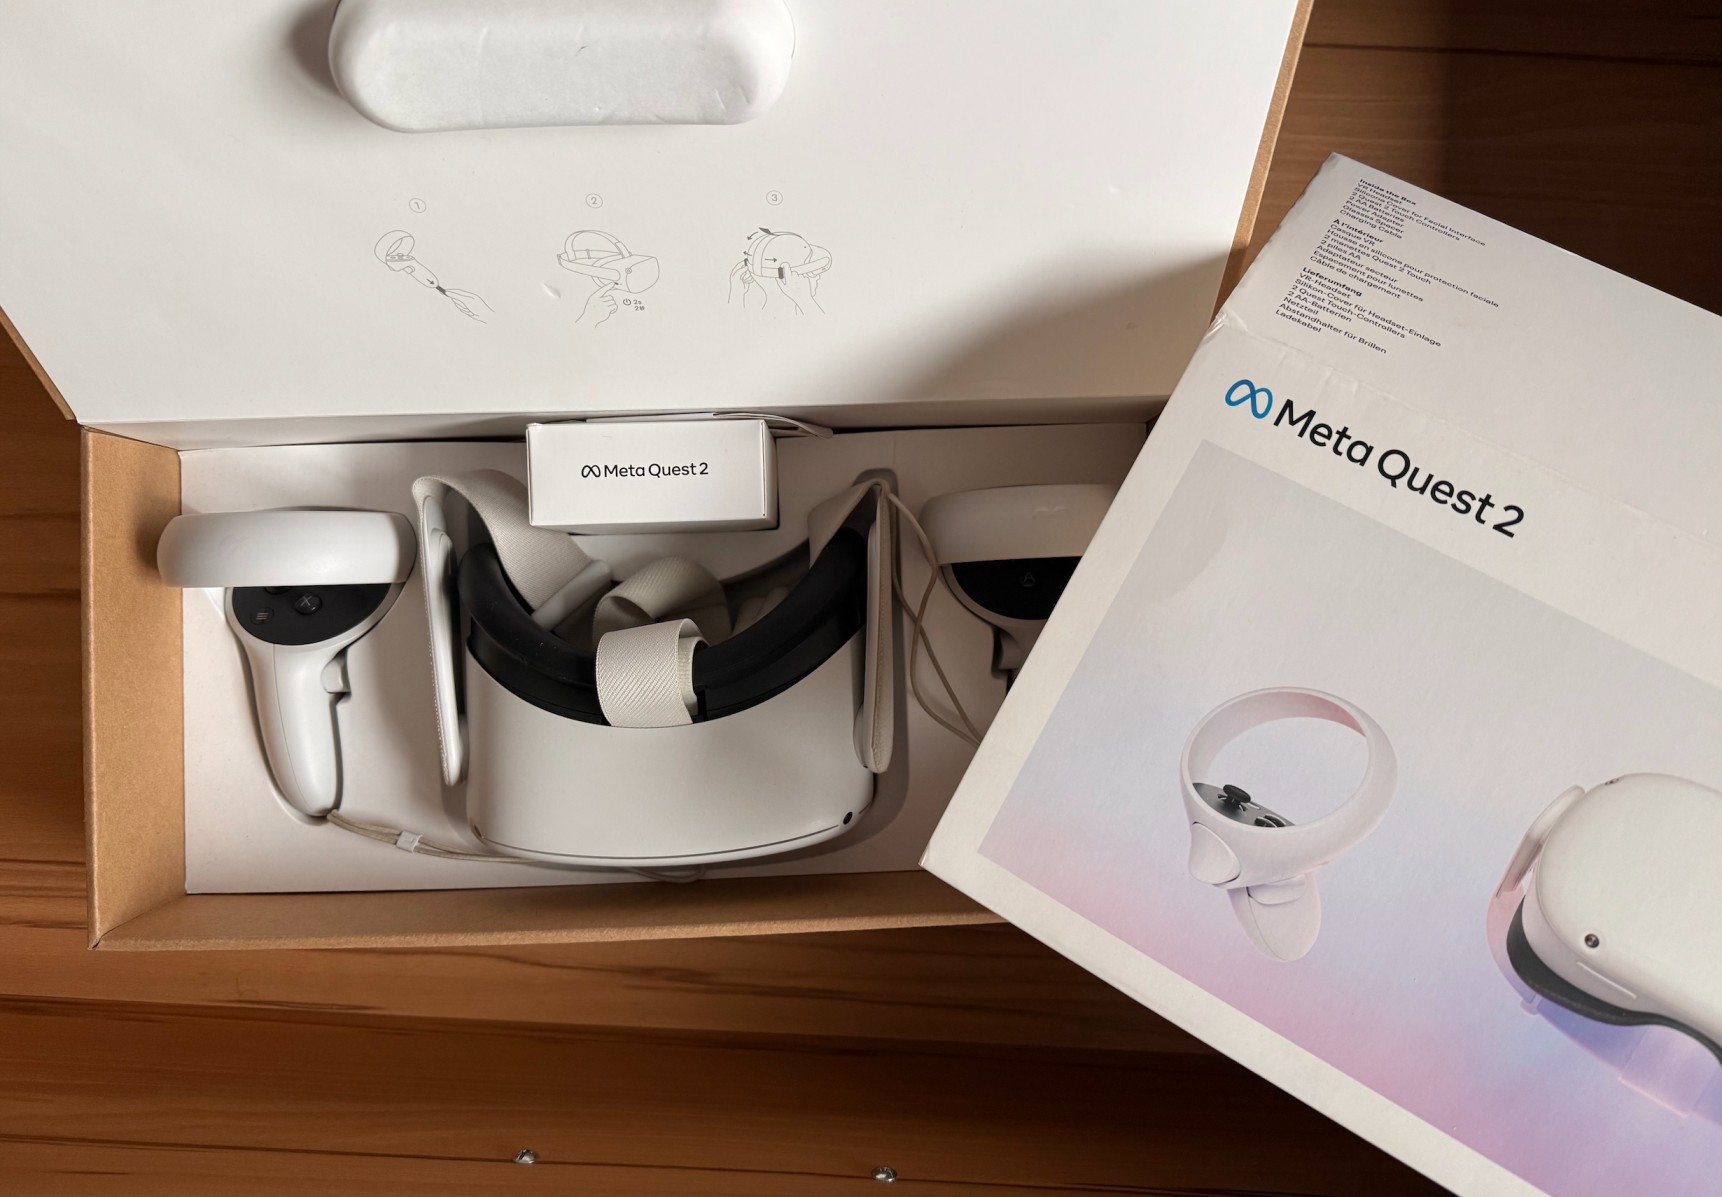
Meta Quest 2
A Meta Quest 2 headset was provided in the first lectures for the development and testing of this project, as shown in the following image:
.png)
.png)
Before starting the implementation (and after some brainstorming), I chose to set the main locomotion technique to a teleportation slingshot and projectile. For the object interaction, the selection would be to catch flowers (instead of the coins already placed in the environment). As for the object manipulation, the idea was to adapt the interaction task, adding a big slingshot that could allow one to throw a big projectile with both hands. Before that, the locomotion slingshot, placed in one of the player's controllers, would be placed in a specific position and rotation to "store" it while performing the task. By this time, I didn't had a specific method in mind to switch between the different types of slingshots.
This was the initial idea presented in class.
Click below to see the presentation.

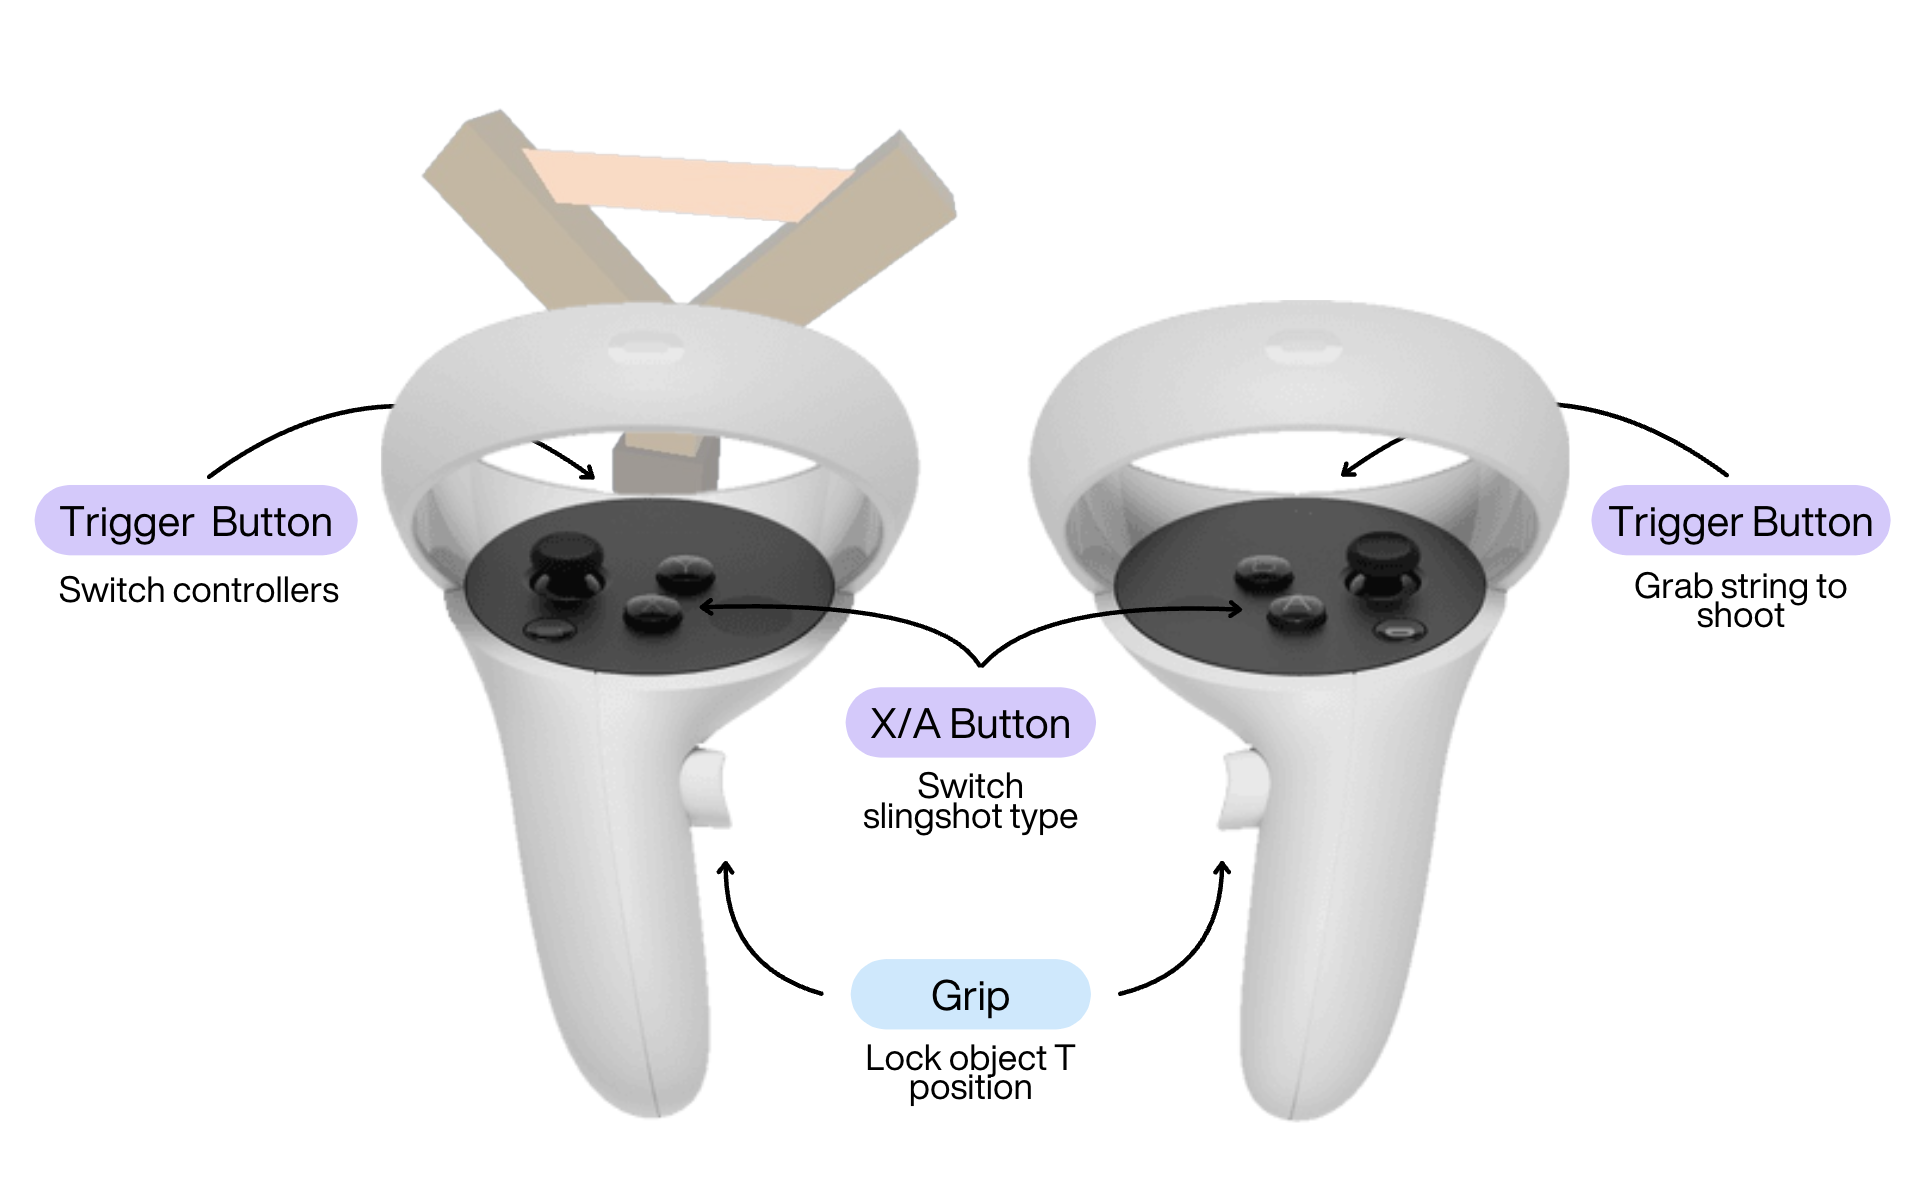
In the final implementation, the game included the three types of slingshots initially idealised:
The locomotion slingshot is the primary tool for moving around. While following the paths, players can swap it with the selection/collection slingshot to collect objects—originally coins, later replaced with flowers. An initial idea was to design a single slingshot with two sides, each marked by a different color to represent locomotion and selection modes. The player would switch between them by rotating the controller 180 degrees. Although I didn't test the single slingshot with double colours, rotation-based switching was implemented with the entire slingshot changing between types upon the controller's rotation. However, while the concept seemed intuitive, its implementation proved unreliable, causing glitches between the two modes. As a result, a simpler yet more effective button-based switch was implemented instead. For the interaction task, the slingshot can be switched between locomotion and a specialised interaction slingshot, designed specifically for such task.


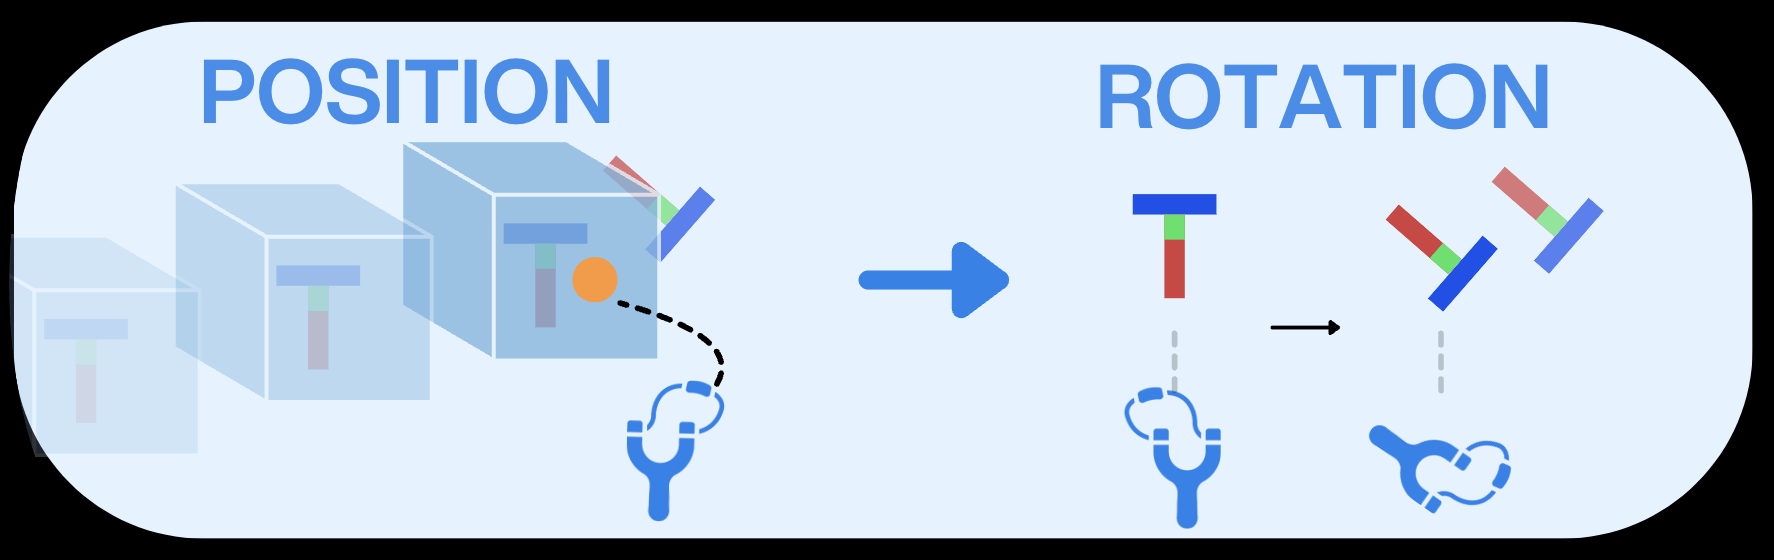
The interaction task was revised after my idea pitch presentation in class, where I realised I was overcomplicating things by creating a new Bigbug, when the focus was actually on object manipulation. Inspired by some of my colleagues' ideas, I instead leveraged the similarities between the slingshot and the provided T-shaped object in the task, mapping the object T's rotation to align with the slingshot. This approach simplified the task while staying true to its core objective, as illustrated in the following image:
The final result of the interaction task is demonstrated here:

The ability to switch the controller between hands is also included, which can be done by clicking on the trigger button of the controller with the slingshot. Therefore, everyone is free to try which way suits them best and is more comfortable.

As the first phase of the project development, I started by brainstorming different ideas for both the locomotion and interaction tasks. It turned out to be easier to get the interaction idea While notting down some ideas, I did some research on different types of VR locomotion and got inspired by existing VR games.
• Broom mechanism to fly around the island (inspired by Harry Potter’s Wizarding World);
• Dog walking, where there would be a leash and the hand movement would control where the dog would go to be followed by the player (inspired by Nintendo Dogs);
• Fishing rod, thrown and attached to the floor, pulling the player toward the target location by mimicking a fishing motion.
• Paper plane, thrown by hand and teleporting the player to its landing spot;
• Slingshot that launches objects, teleporting the player to their landing position (inspired by Angry Birds).
I decided to go with the slingshot teleportation mechanic, as it offered a simple yet satisfying gameplay experience. This choice not only aims to enhance the overall fun factor, but also to mitigate the risks of cybersickness, ensuring a comfortable and enjoyable VR experience for players.
As an unfortunate user, I encountered several problems when setting up Unity on my computer...
I was confident at first that installing Unity Hub and Unity on the Parallels Windows Virtual Machine (VM) would be enough, which turned out to take too much time to finish installing, so I ended up setting up both softwares on the MacOS instead.
However, installing the required "All in One SDK" in my assets didn’t work (it simply didn’t appear on the app itself, even though it appeared on the browser). Funny enough, installing each individually worked fine (uff).
Everything seemed to work "fine", until the testing part came. As a Mac user, I wasn’t able to install Meta Quest Link. I also tried installing it on my Windows VM, but was unsuccessful to open it due to the hardware it requires (I believe). Downloading Steam VR was my second option, but (guess what?) didn’t work, as it only seems to have a beta version for Mac that nearly works.
So, at last, I opted for a third option: I used a colleague's Windows computer.
Since I didn't have any experience on Unity, I started by following a simple course in Unity Learn, as recommended. Upon following the instructions, I ended up creating my first game: Roll-A-Ball.

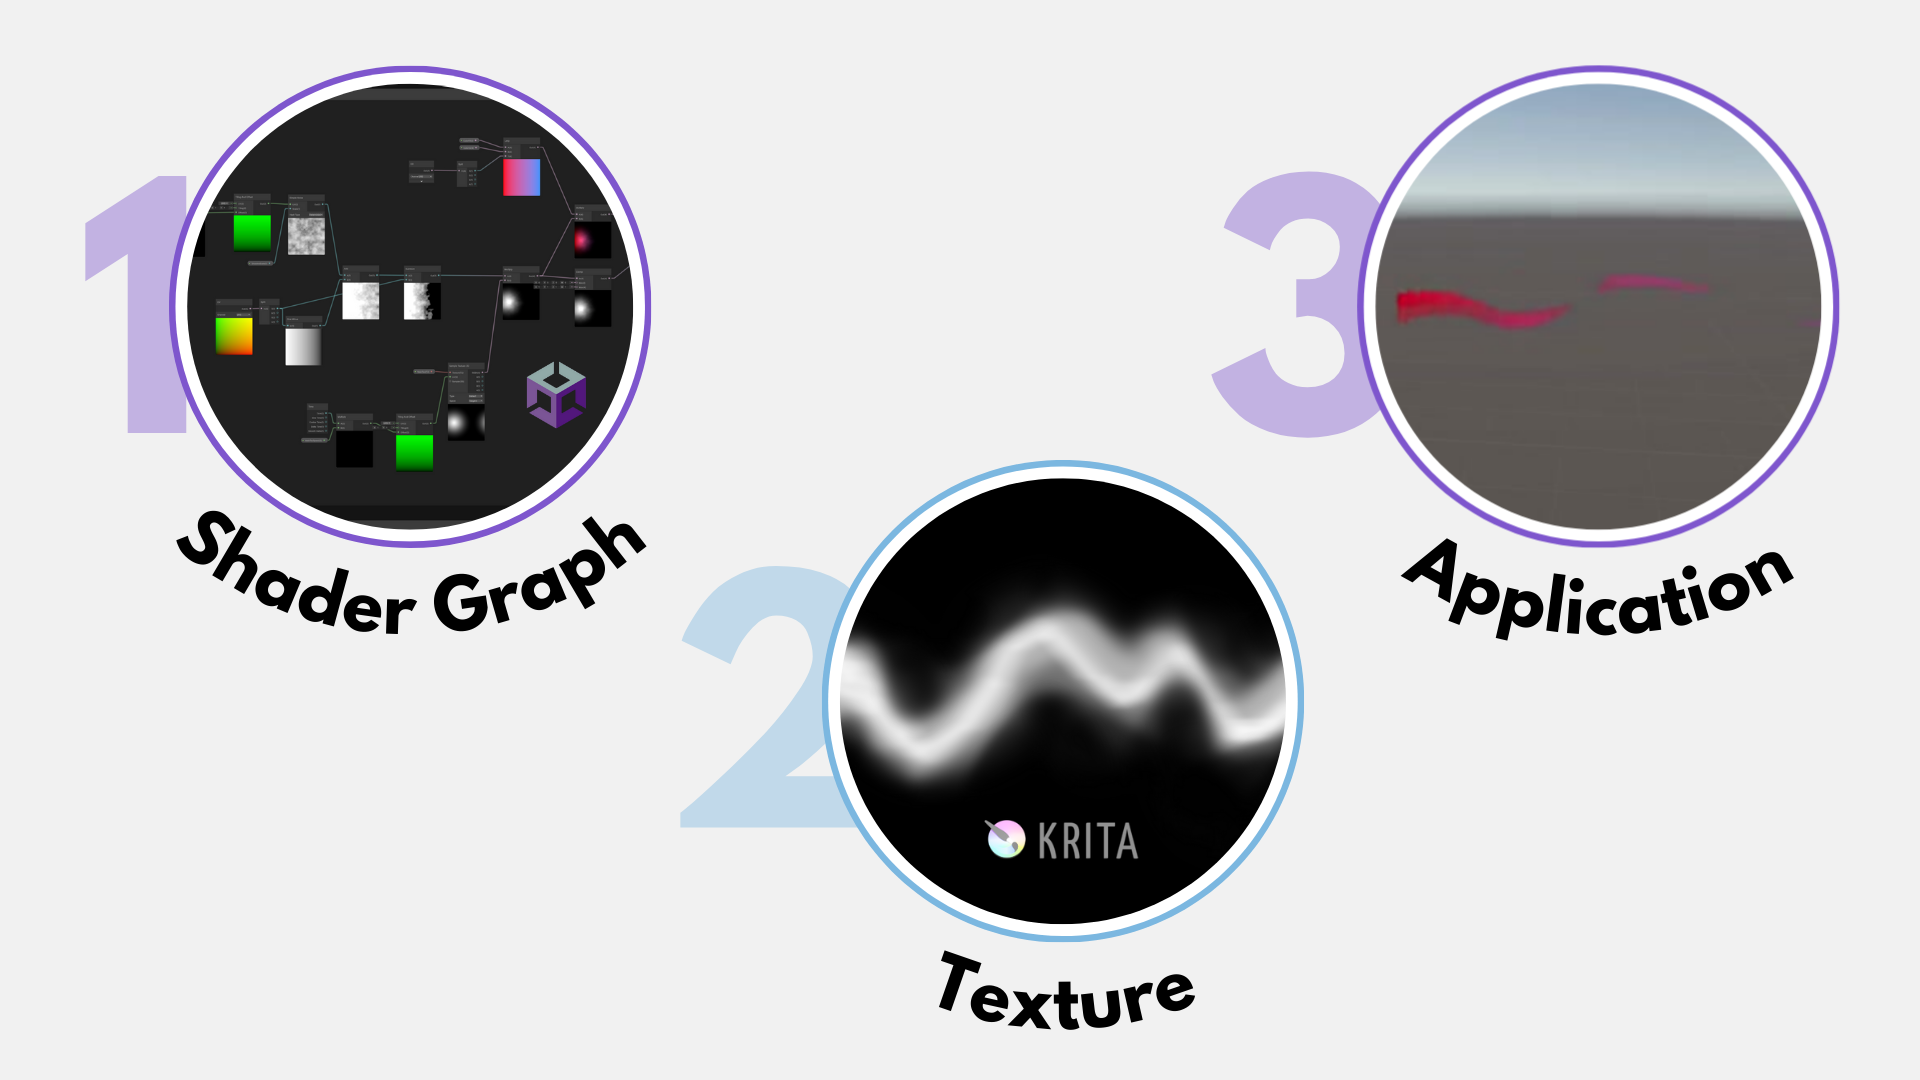
Besides freely navigating tutorials to better understand how Unity works, we were asked to choose a tutorial and present it in class. I opted for the "Stylized Trails Tutorial" shown in this YouTube video.
The tutorial consisted of three phases: 1) creating a shader graph; 2) designing a texture in Krita; 3) and applying both to an object to simulate a moving trail effect.
Click below to see the presentation.
I then applied the stylized trail I had created to the Roll-A-Ball game, which can be seen here:

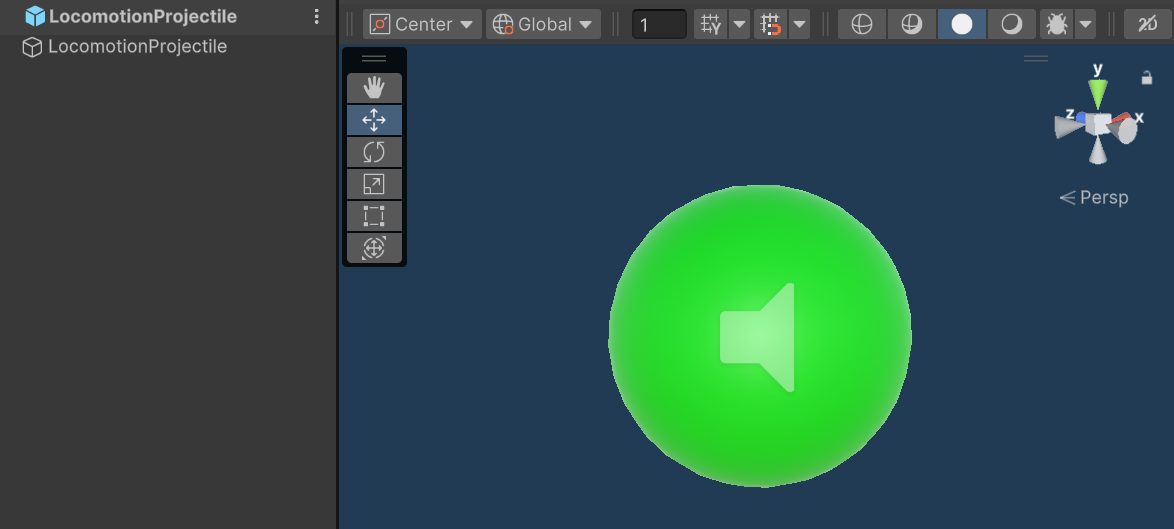
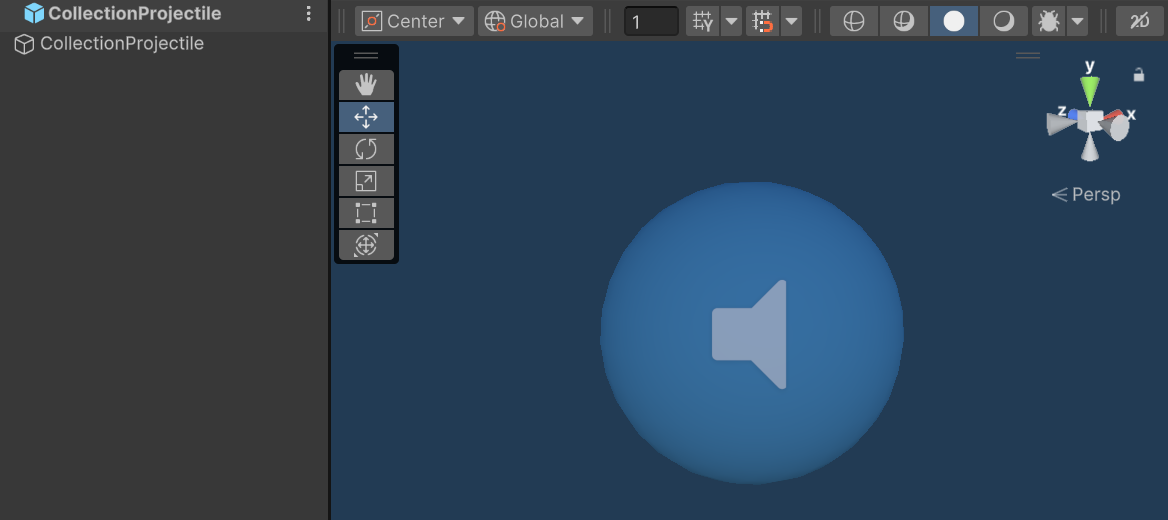
To implement the slingshots, I began by creating a prefab for each type with its respective projectiles.


Check below to see more details of each prefab.
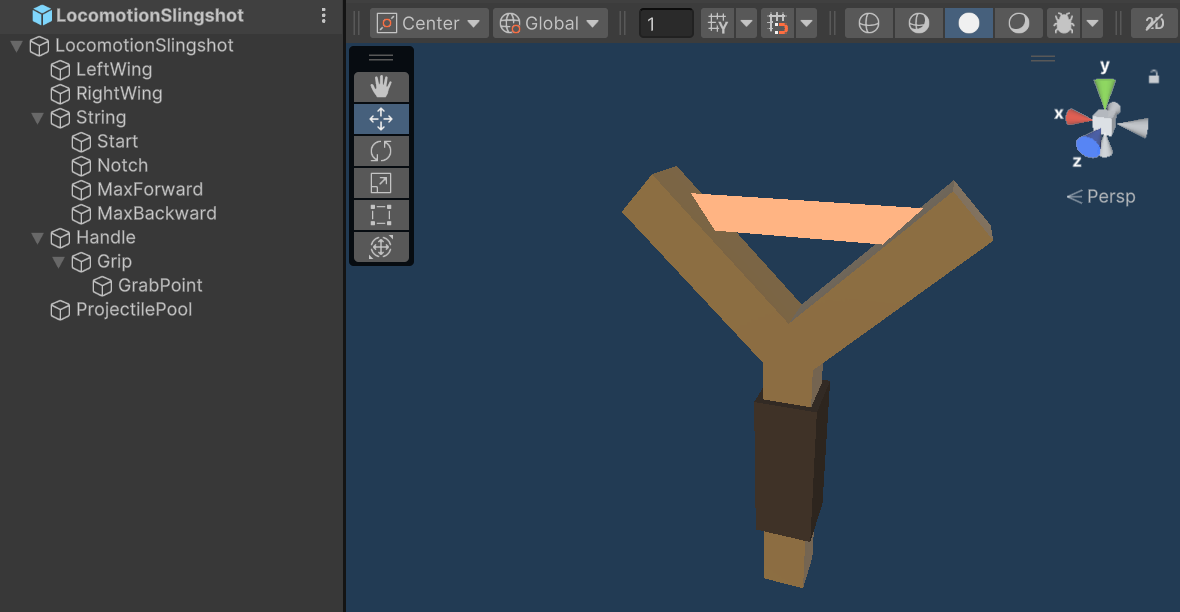
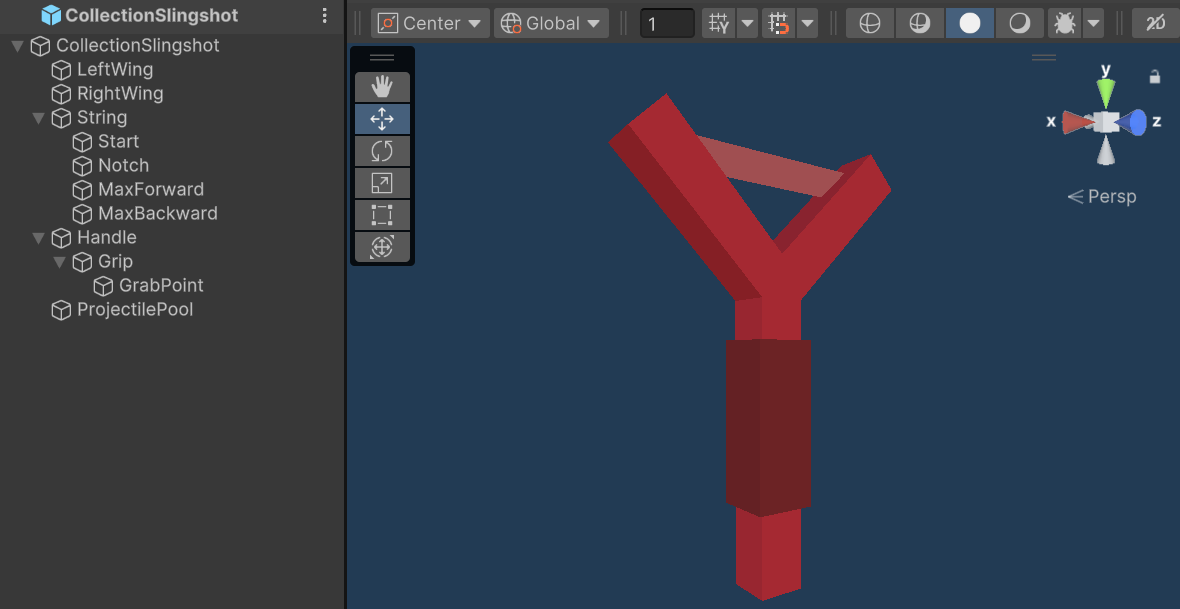
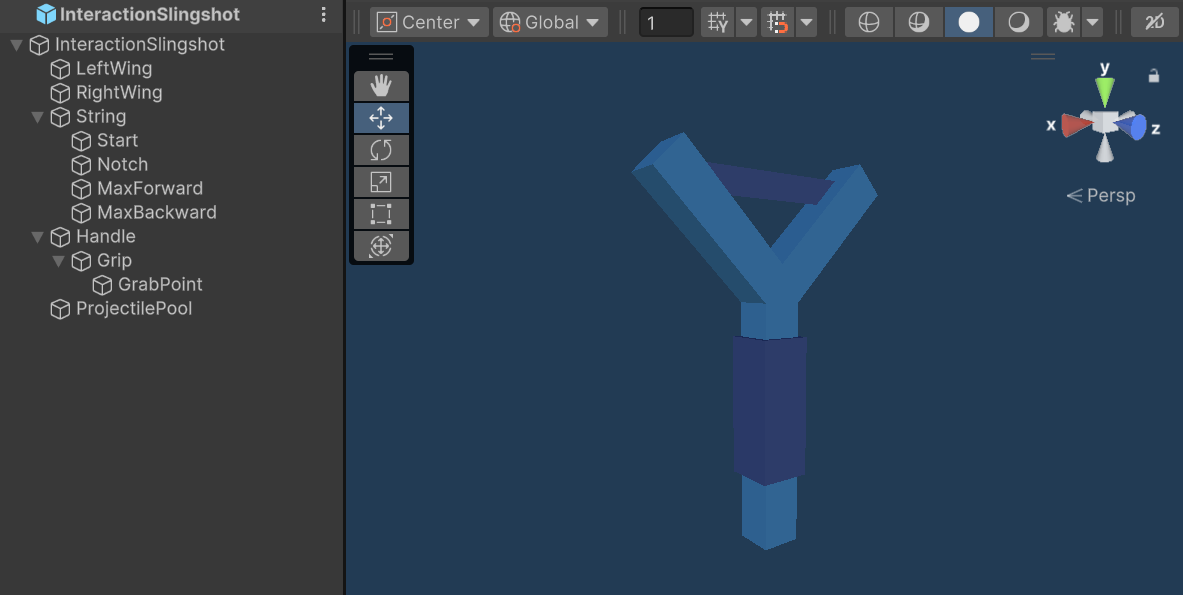

The most crucial part of the project—where more than 80% of the time was spent—was implementing the slingshot mechanics. To simplify the development, I adopted an object-oriented approach for handling any logic associated with a prefab, including the slingshot. This means that each key component of a prefab has its own script, encapsulating its specific logic. In the case of the slingshot, both the handle and the string have dedicated scripts to manage their behaviour.
After creating the slingshot and projectile prefabs, the first step was to add the string using Unity's Line Renderer and position the slingshot on the controller. Initially, I struggled with the positioning, but after some trial and error, the following code resolved the issue.
transform.SetParent(controller);
transform.position += controller.position - slingshotHandle.GrabPointTransform.position;
transform.rotation = controller.rotation;
This code is always called at the start of the game, and whenever the player chooses to switch the controller holding the slingshot, so as to position it correctly on the new controller.
After positioning the slingshot, the next big objective was to implement its shooting mechanics. However, before tackling that, I first needed to focus on the string grab and pull functionality. For this, I drew inspiration from a previous student's class project and this YouTube tutorial. The logic was quite simple: whenever a controller’s collider came into contact with the string’s collider, and the player pressed a specific button (in this case, the trigger button), the string would be considered grabbed.
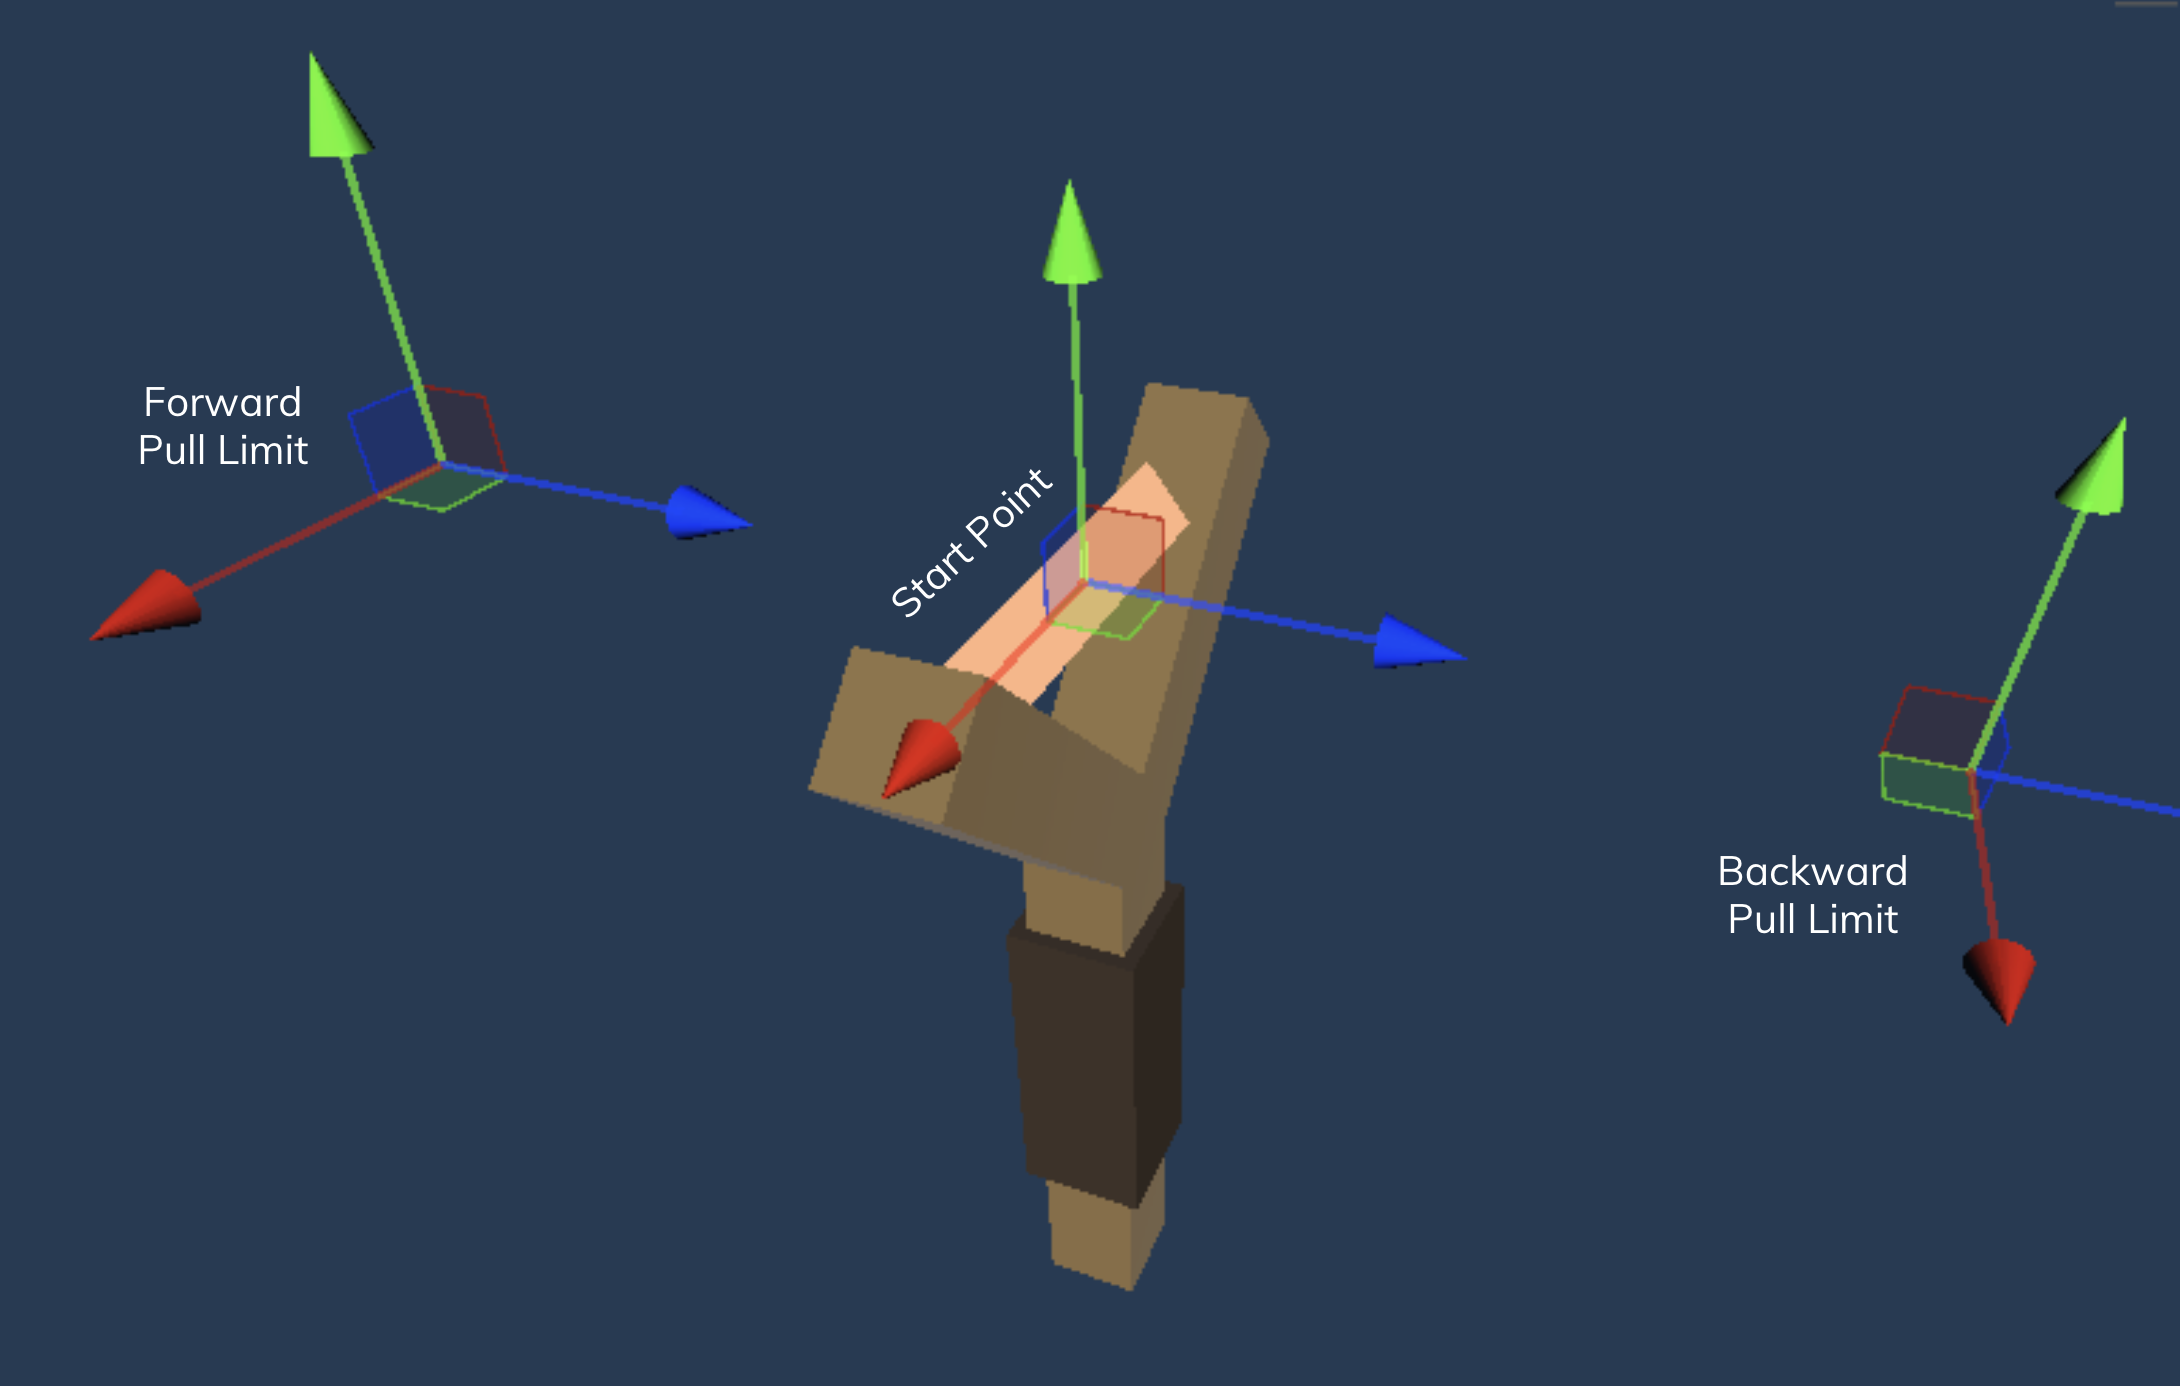
Additionally, the slingshot’s string is defined by a set of three key points (two in the case of a bow):
• the start point: the middle of the string when at rest;
• the forward pull limit: the maximum point the string can be pulled forward;
• the backward pull limit: the farthest point the string can be pulled backward.
The Unity's Line Renderer component stores these three points, defining the string’s "line-like" shape. The middle point acts as the grab point, dynamically updating as the player pulls the string.
When the string is grabbed by a controller and the player moves that same controller, the grab point (the middle point of the Line Renderer) moves accordingly. However, its position is always clamped within the slingshot’s predefined maximum forward and backward limits.
One rather funny error I encountered had to do precisely with these position limits. I initially forgot to enforce the boundaries, which resulted in a scenario where the player could pull the slingshot’s string infinitely.

The fix to this issue was rather simple. I just had to set these values and consider them when updating the string's grab point position.
// Only allow drawing the string to positions between the max
// forward and backward positions.
if (IsDrawingPositionAllowed(drawPosition))
{
  // Update the string renderer's position.
  stringRenderer.SetPosition(1, stringRenderer.transform.InverseTransformPoint(
  stringRenderer.transform.position + drawPosition));

  notch.localPosition = stringRenderer.GetPosition(1);

  drawForceFraction = (notch.position - min.position).magnitude / maxDrawMagnitude;
}
From the above code, two things are important to note for later:
- The notch component symbolises the position at which projectiles are spawned.
- The force with which a projectile is shot is dependent on the string draw distance.
Finally, and before moving onto the shooting logic, I had to first make it so projectiles could spawn. This was a relatively straightforward task. I decided, as it made the most sense to me, that projectiles were to only spawn when the player was drawing the slingshot string. With this in mind, all I had to do was use a simple if statement to determine whether or not the conditions to spawn a projectile were met.
When it came to spawning the actual projectiles however, one particularly weird error arose. When spawning a projectile for the first time, everything worked correctly, but after the second time spawning it, the projectile's scale changed for some reason, reducing its size.
I managed to fix part of this problem with a somewhat hacky solution. By storing the scale of the projectiles on their first spawn, and overwriting their scales with the stored value on subsequent spawns. Nonetheless, this fix worked only for the locomotion projectile, leaving the other two to suffer from this mysterious bug that I ended up not being able to fix.

With now being able to grab and pull the string, the next step was to implement shooting. To do this, I followed the logic explained below.
When the slingshot string is grabbed, and after the player releases the string grab button, the projectile is shot. This translates into a force with the forward direction of the string, being applied to the projectile. As shown in the previous code snippet, this force is calculated based on the distance that the player has pulled the string, in relation to its starting position. Upon calculating the force to be applied, the shooting mechanic is as simple as calling the Unity AddForce method, like so:
public void Shoot(Vector3 direction, float drawForceFraction)
{
  transform.parent = null;
  rb.isKinematic = false;
  trailRenderer.enabled = true;

  // Important to note that the aforementioned force that is calculated
  // and passed onto this method, is multiplied by a user defined 'force'
  // variable, so as to give more power to the projectile.
  rb.AddForce(force * drawForceFraction * direction, ForceMode.Force);
}
With the shooting mechanics now working, all that was left was to setup the proper interactions between the projectiles' colliders and the respective colliders with which they would interact: locomotion projectiles interact with the ground, collection projectiles interact with coins, and interaction projectiles interact with the interaction task objects (panels and targets).
The implementation of these interactions was very simple, all it required to do was associate appropriate tags with every object of interest (floor tiles, coins, and interaction task objects), and take said tags into consideration when writing the projectile's
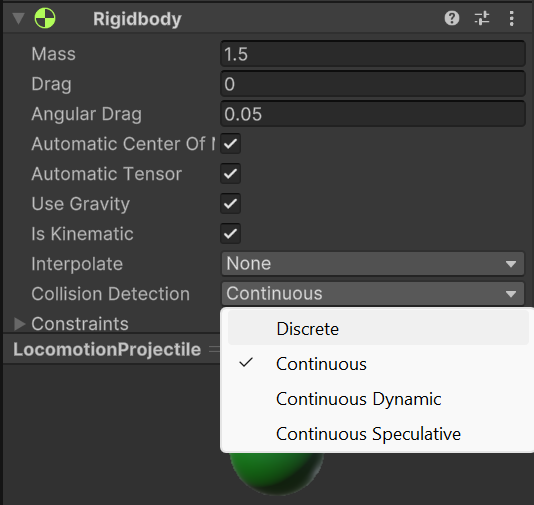
OnTriggerEnter and OnCollisionEnter methods.When a locomotion projectile collides with a floor tile, their first collision point is used as the player's next teleport position. At first, an error was occurring, where the locomotion projectiles would not register a collision with the ground, and would instead phase through the floor tiles. This turned out to be happening because the floor tiles were mesh colliders, and the locomotion projectiles' collision detection was set to discrete. To fix this issue, all I did was change said collision detection from discrete to continuous.

Additionally, during teleportation, a small error was happening where the player would be teleported multiple times when the projectile hit the ground. This happened because the projectile would not disappear from the scene until a new projectile was spawned, making the original projectile roll on the ground and collide with it multiple times, therefore triggering a teleport on each new collision. The solution this issue was simple: I had to make sure that, after a projectile collided with a floor tile and the teleportation was triggered, the projectile was destroyed.
When collection projectiles collide with a coin, the coin is collected and, once again, the projectile disappears. A coin being collected means that the player's coin count is incremented and the coin's game object is deactivated. During coin collection, an error was occurring where coins were either not being collected, or collected way later than expected. This, however, was easily fixed by moving the coin collection logic (incrementing coin count and destroying the coin) to be the first thing that happened after the collision with the coins, making it happen immediately after, and with no delays.

If a projectile collides with an object that does not trigger its expected behaviour—such as a collection projectile missing a coin—it will be destroyed upon eventually hitting a floor tile. This ensures the scene remains free of unnecessary objects. Similarly, other scene elements that do not have specific interactions with projectiles, such as mountains and houses, are treated as obstacles. By default, when a projectile hits an obstacle, it is also destroyed.
As a final slingshot implementation detail, the method for switching between slingshot types evolved throughout development. In the final version, the player simply presses a button to switch between types. Initially, however, I implemented a turning motion mechanic, where rotating the controller holding the slingshot 180 degrees would trigger the switch. While this approach seemed more immersive, it proved unreliable, often causing accidental switches. Ultimately, although using a button press may not be as visually engaging, it provided a more reliable and intuitive solution, making it the preferred choice in the final version.
For the interaction task, following my second approach, I created a moving target box that would spawn in front of the player, who must hit it with a projectile. The box is semi-transparent, with an object T (prefab already included in the initial provided environment) inside. In order to make this shooting part more interesting, the target moves randomly in one of three directions: horizontal, vertical, and diagonal. Additionally, along the target’s path, a transparent object T spawns at a random position and rotation. This object T is used for the object manipulation part of the interaction.
When the player successfully hits the moving target with the interaction projectile, the target box breaks, and the object T inside it becomes fixed in place. From this point, it mimics the rotation of the player’s slingshot, effectively allowing the player to control its orientation.
The goal is to align the slingshot that broke free from the target with the transparent one. Once the player is satisfied with the positioning, they press the lock button (controller's grip), finalising the slingshot’s position. This locked position is then used to calculate the error score.
But how does the interaction task even start?
This sequence begins when the player moves through a circular starry zone, triggering the appearance of a "Start" panel. At this point, the slingshot type switch no longer toggles between locomotion and collection, but instead between locomotion and interaction (blue slingshot).
In terms of collisions, when an interaction projectile collides with an interaction task panel (such as the "Start" or "Done" buttons), the interaction task either begins or ends. If the projectile collides with an interaction target, the target is destroyed, allowing the player to proceed with the object manipulation phase of the interaction task.
Once the player passes the next path banner, the slingshot switch reverts to its previous state, toggling between locomotion and collection modes.
As a recap, the interaction task's flow is as follows (using the interaction slingshot and projectiles):
- The player hits the "Start" button.
- A moving target spawns, which the player has to hit.
- After hitting the target, the object T that is inside of it breaks free, and the player begins controlling its rotation.
- When the player is happy with how close the slingshot is to the transparent object T, its orientation is locked in place by pressing the controller's grip button, and the player hits the "Done" panel.
- A countdown starts, after which the player can hit the "Start" button again and start another interaction task round.
- After three completed rounds [1-4], the interaction task is over.
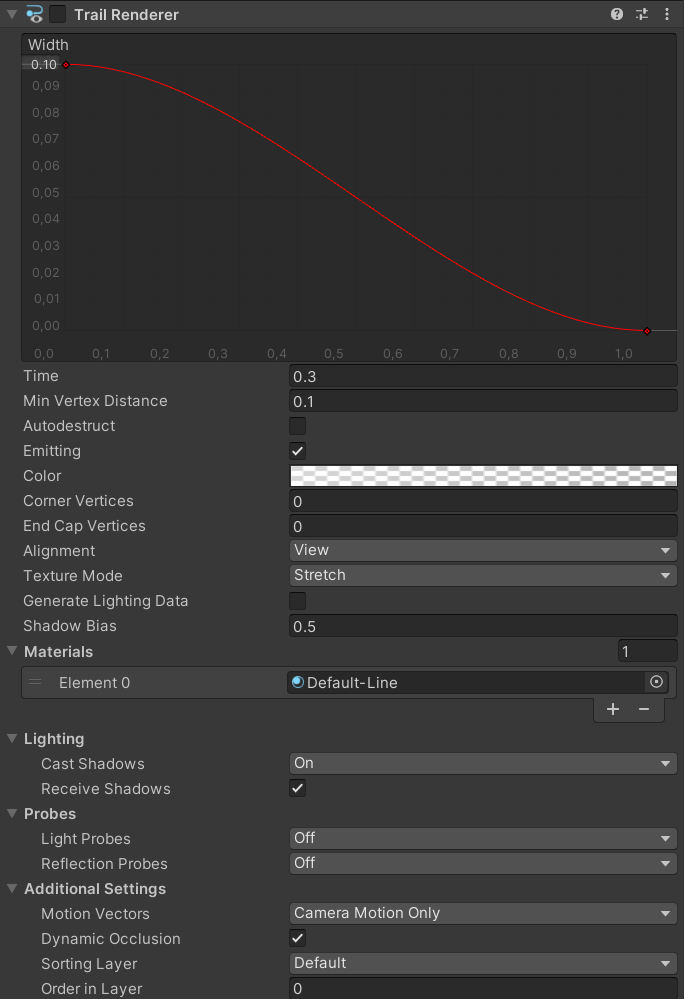
To make it more clear where the projectiles go to and land, I decided to add a projectile trail using Unity's trail renderer. Although I could've used one of the trails I did for the "Stylize Trails Tutorial" presentation, I decided to apply a simpler trail following this tutorial.

One additional feature I had planned on adding was to have the projectile's trajectory trail be drawn whenever the player was drawing the slingshot string. This way, they could know where the projectile would go, thus aim better. I thought of using a phantom projectile of sorts to implement this feature, where an invisible projectile would constantly be shot from all of the player's drawing positions. I would then simply draw a line through all the points that the phantom projectile traversed through. Implementing this feature without relying on Unity's physics would make it so that, even with changes to the physics engine, the trajectory would still be visible. Unfortunately, due to time constraints, I didn't end up implementing it.
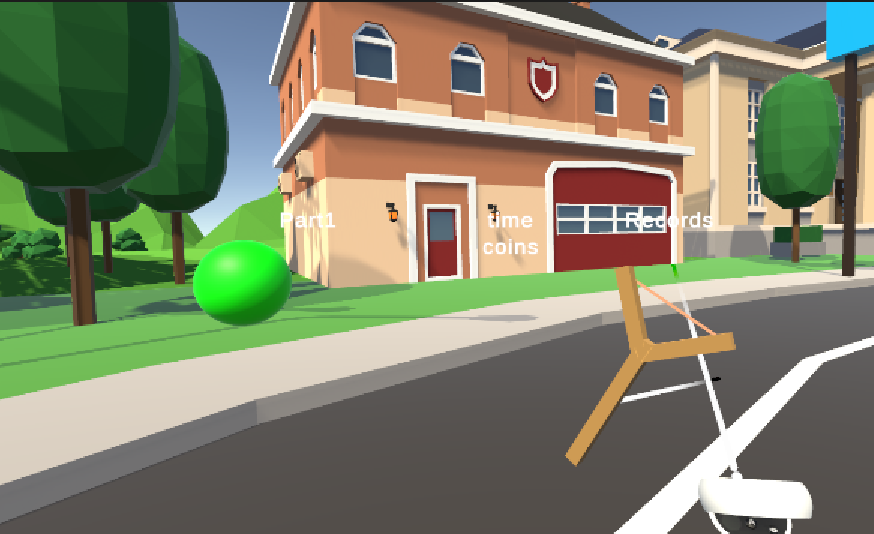
Collectible Flower
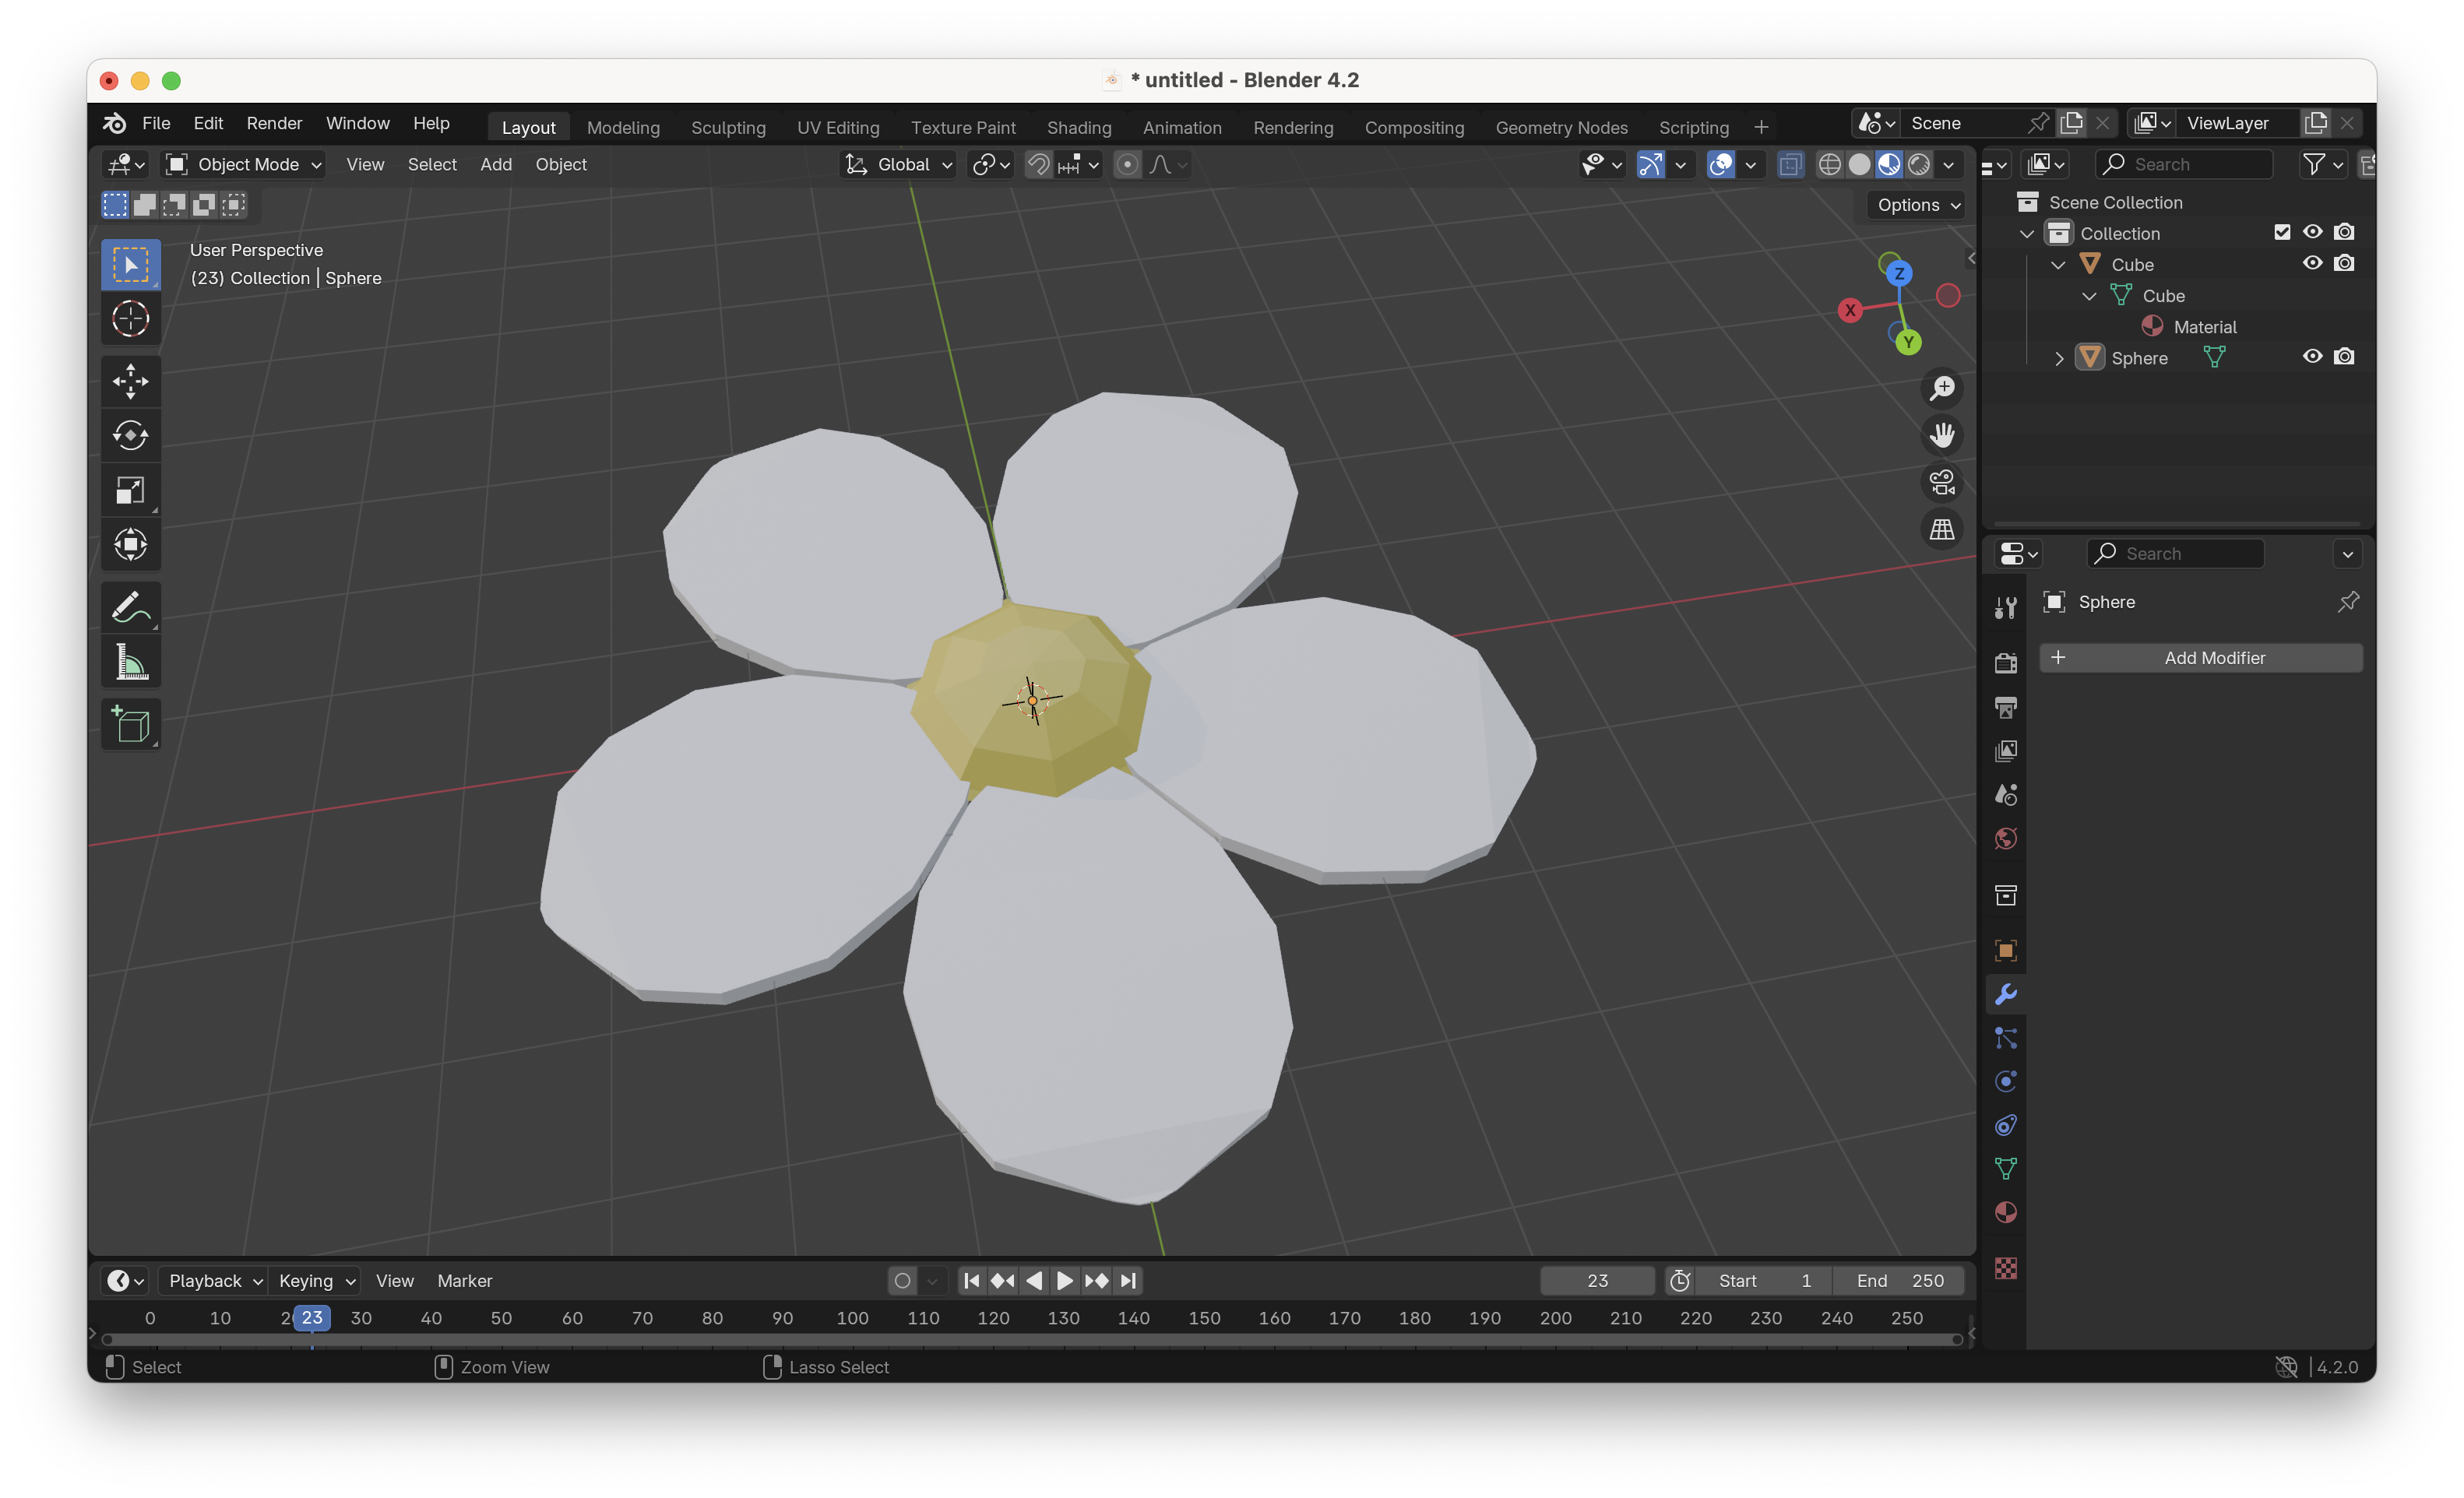
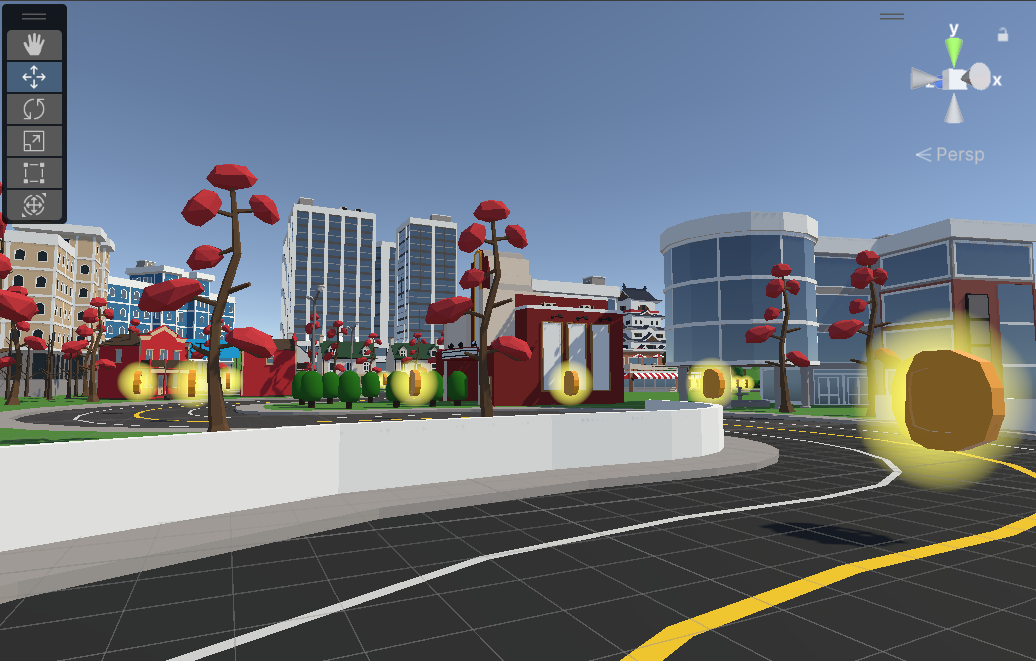
Since the original idea was to use bugs as projectiles, it made sense to implement collectible flowers instead of coins. To achieve this, I created a simple flower model in Blender, following this tutorial. I then replaced the coin in the existing Coin prefab with the exported flower model.
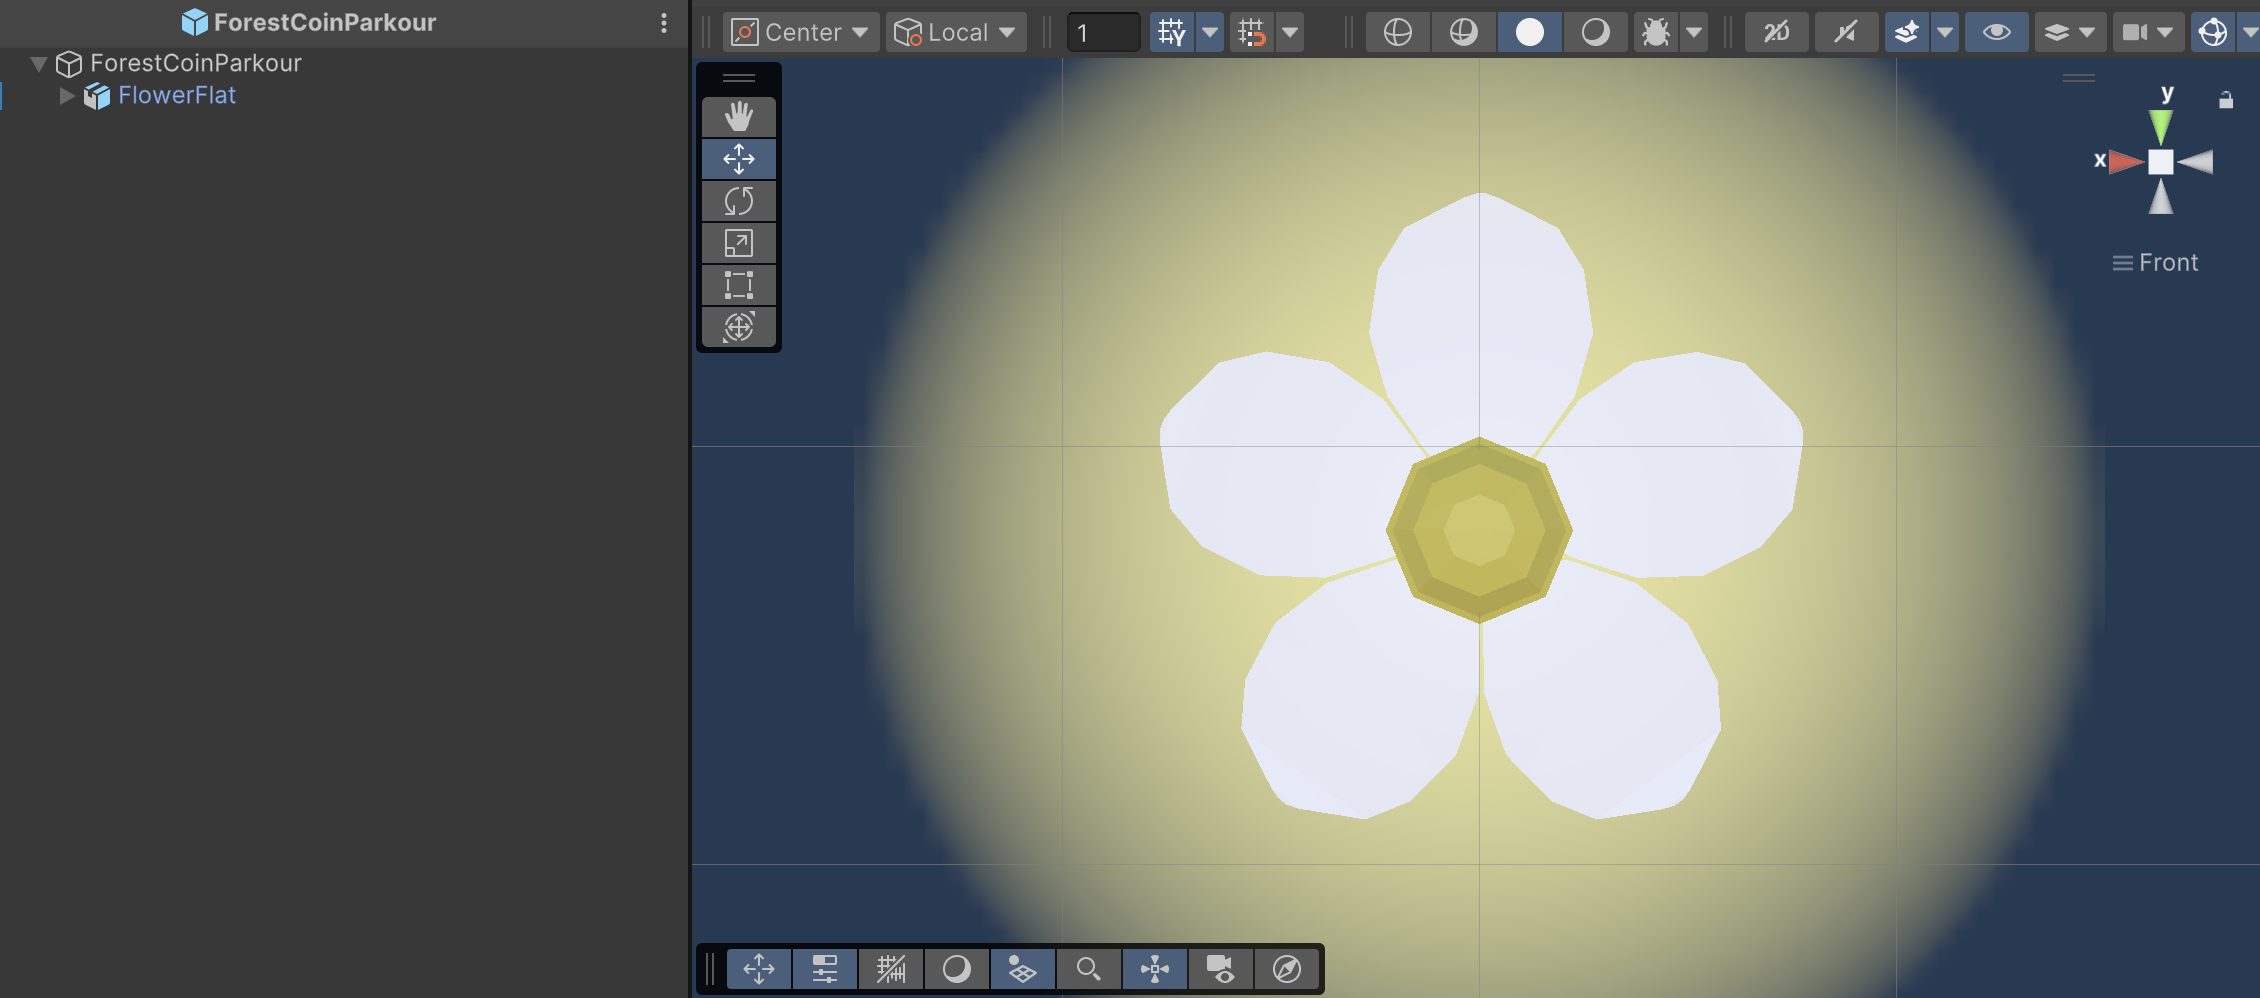
This is the final result:
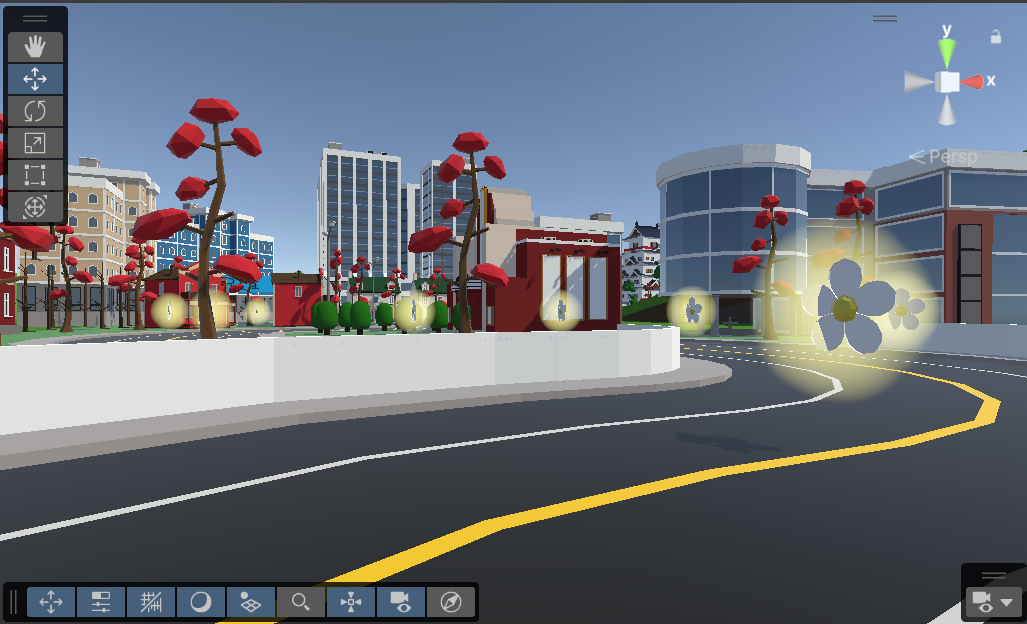
To enhance the experience and make it more engaging, I incorporated custom audio for the teleportation and slingshot grab/shoot mechanics, as well as a unique sound effect for collecting flowers.
• Slingshot Sound
• Teleport Sound
• Collect Sound

To evaluate the implemented solution, a small user study was conducted with three participants: two with some VR experience (including myself) and one with no prior VR experience.
After providing basic instructions on how to play, participants were asked to complete the full path using my Meta Quest 2 headset. Upon finishing, they were presented with a survey to assess various aspects of the experience, including immersion. Additionally, the participants were asked for any final open-ended feedback.
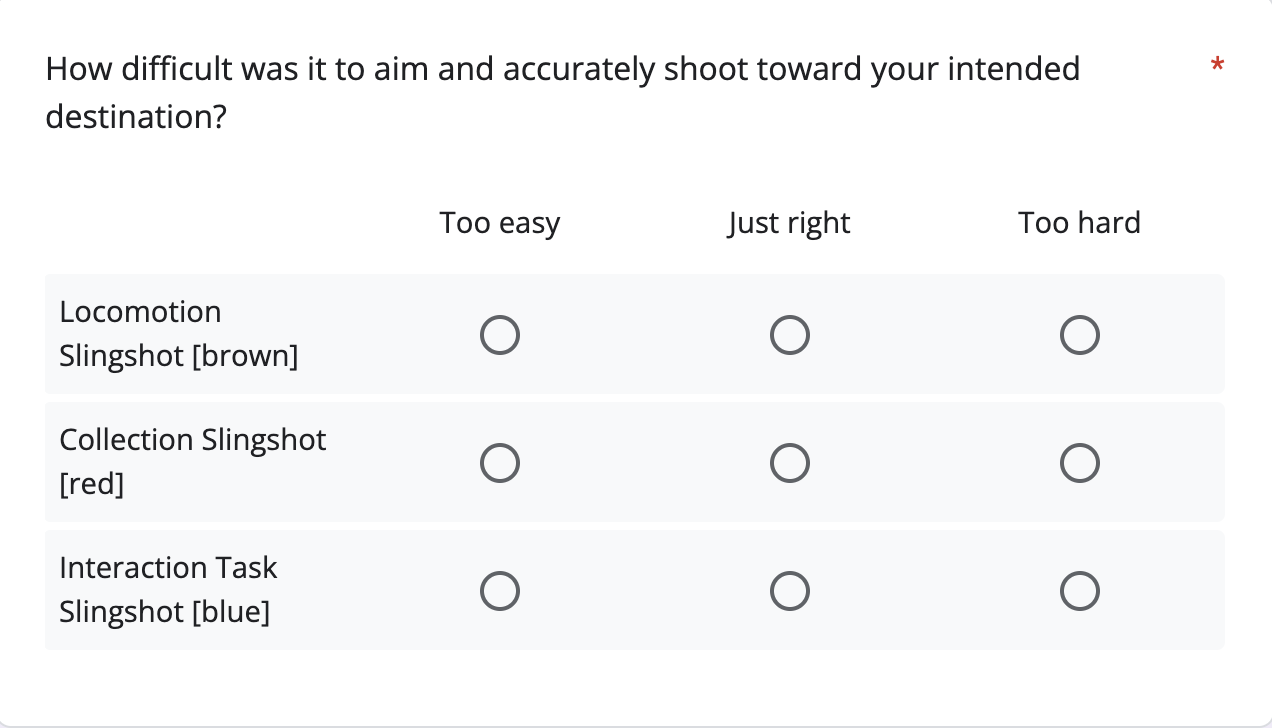
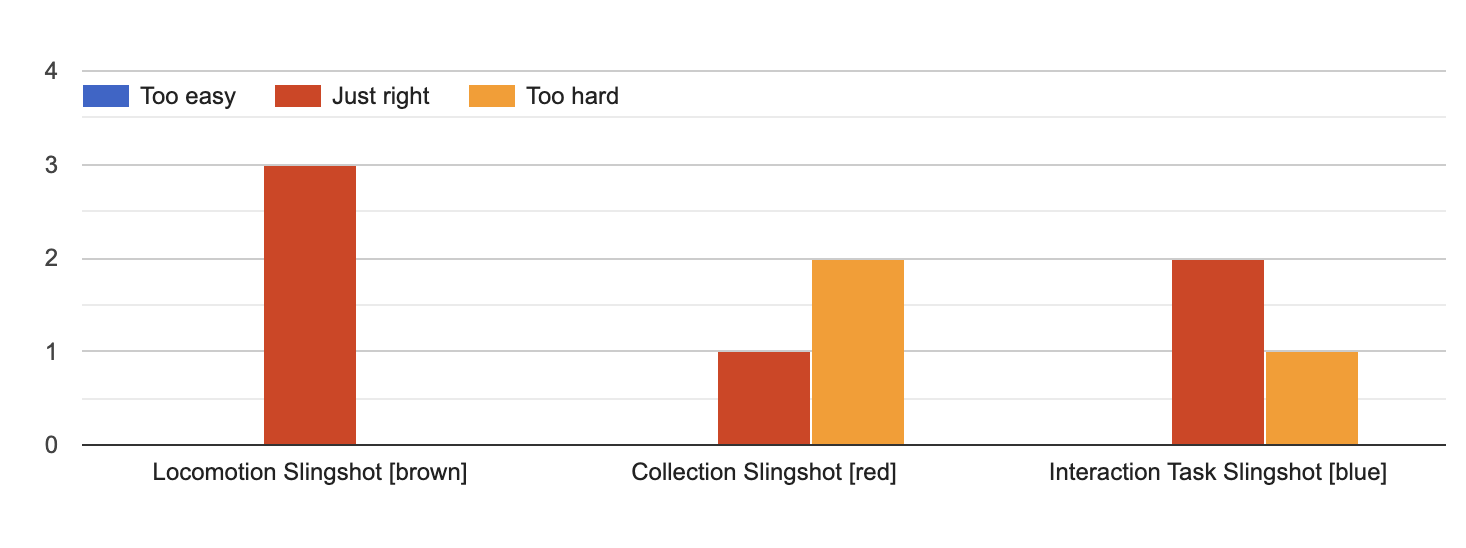
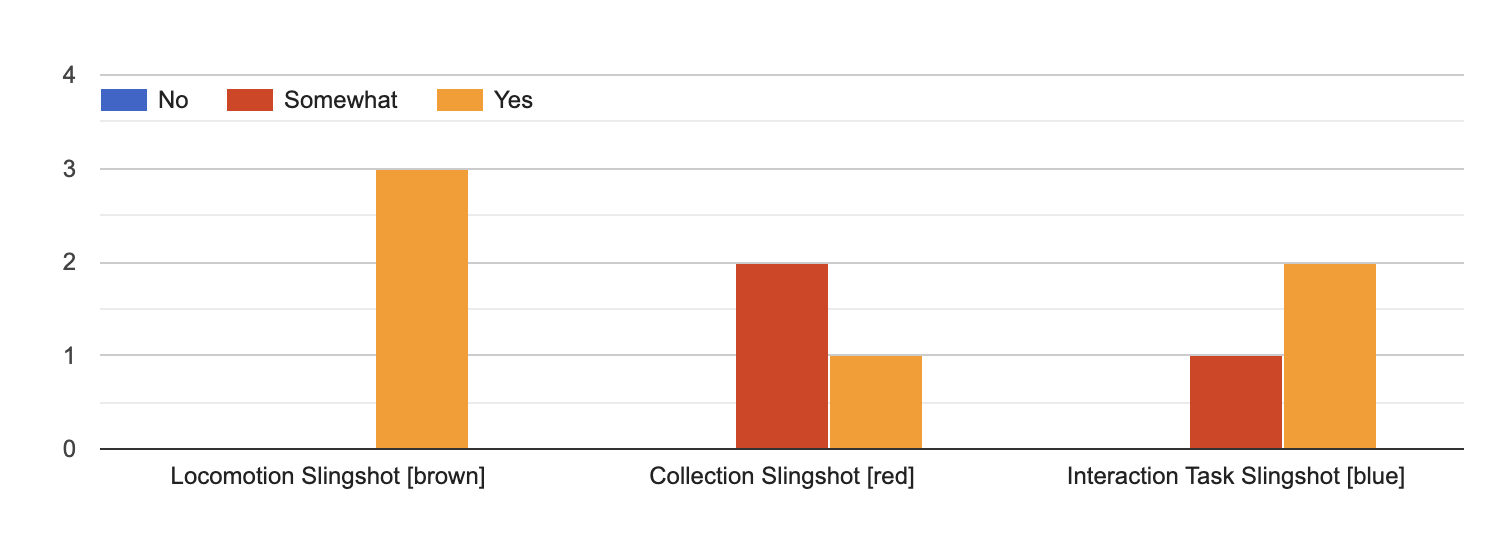
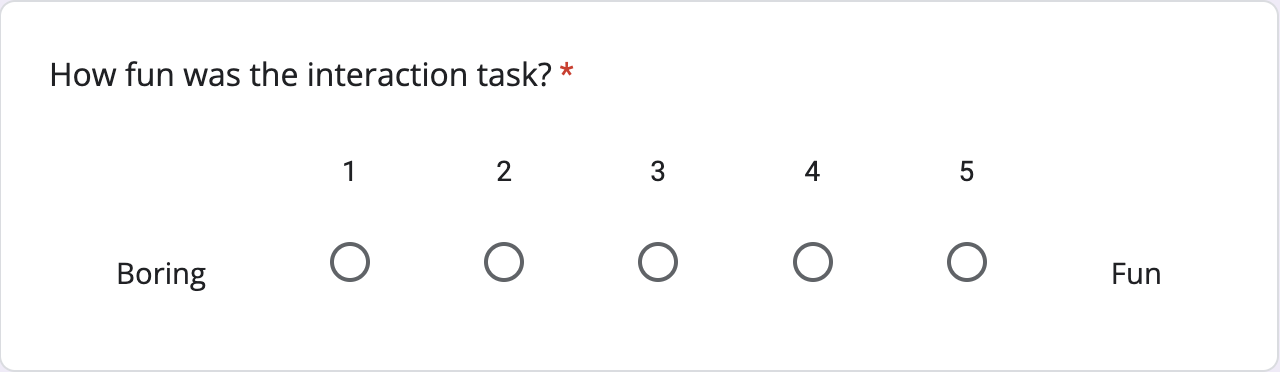
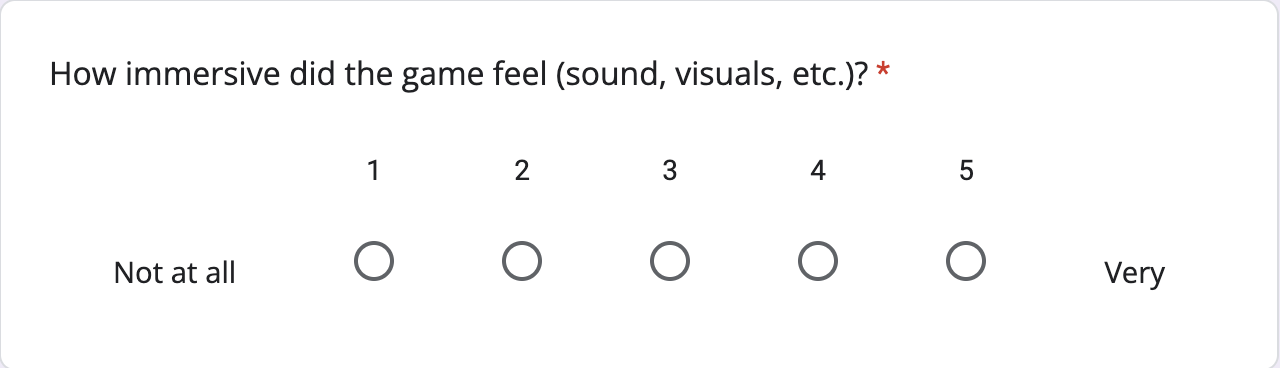
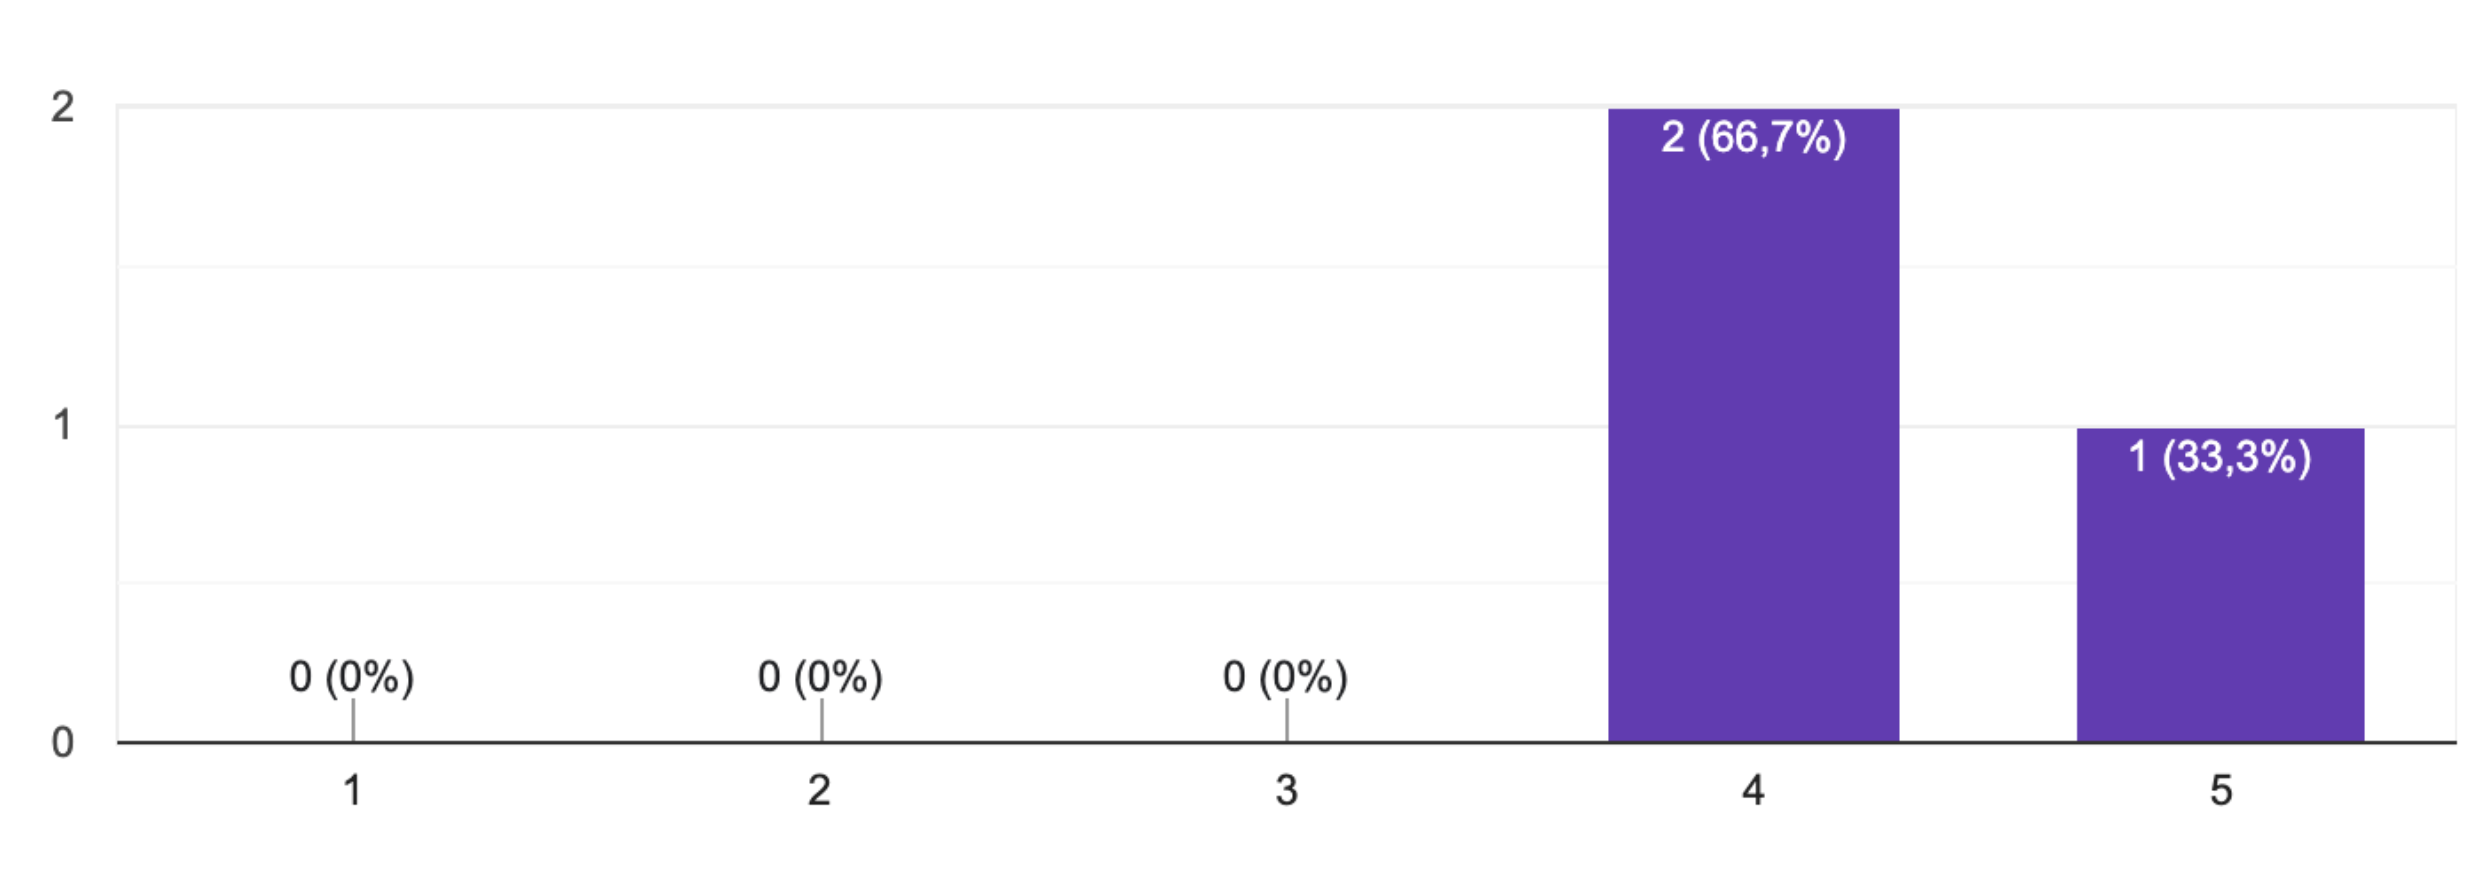
Below are the questions and respective answer results from the survey.
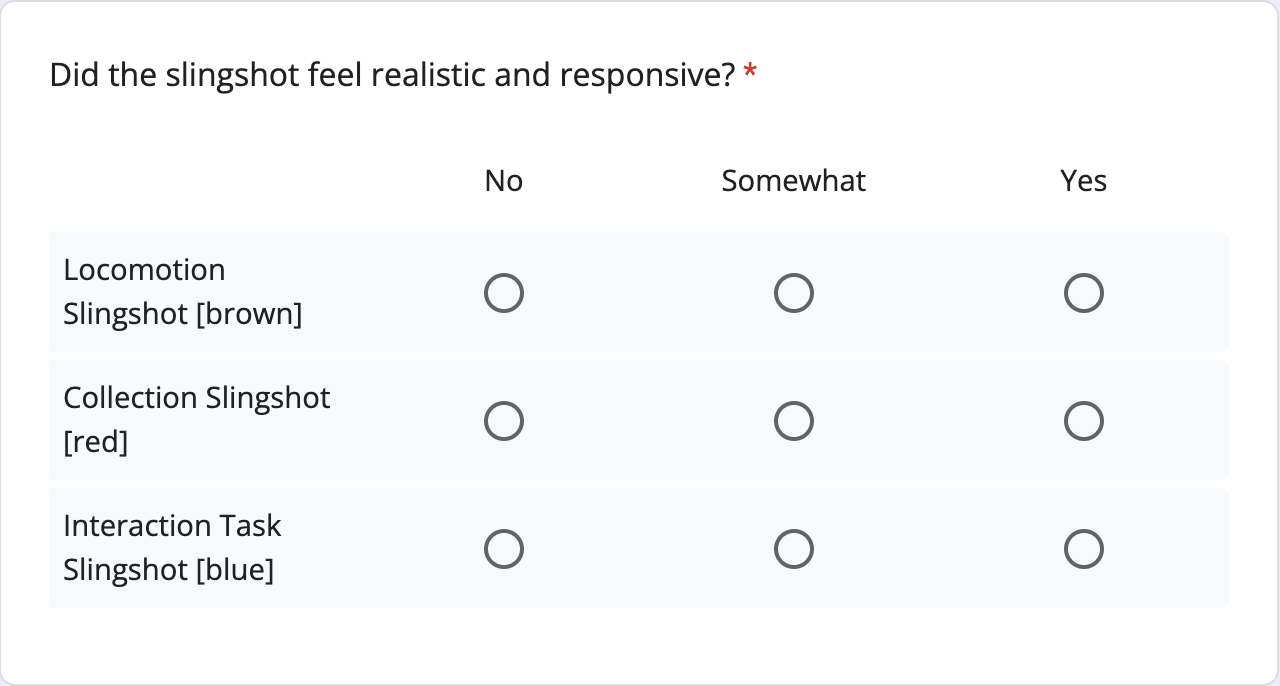

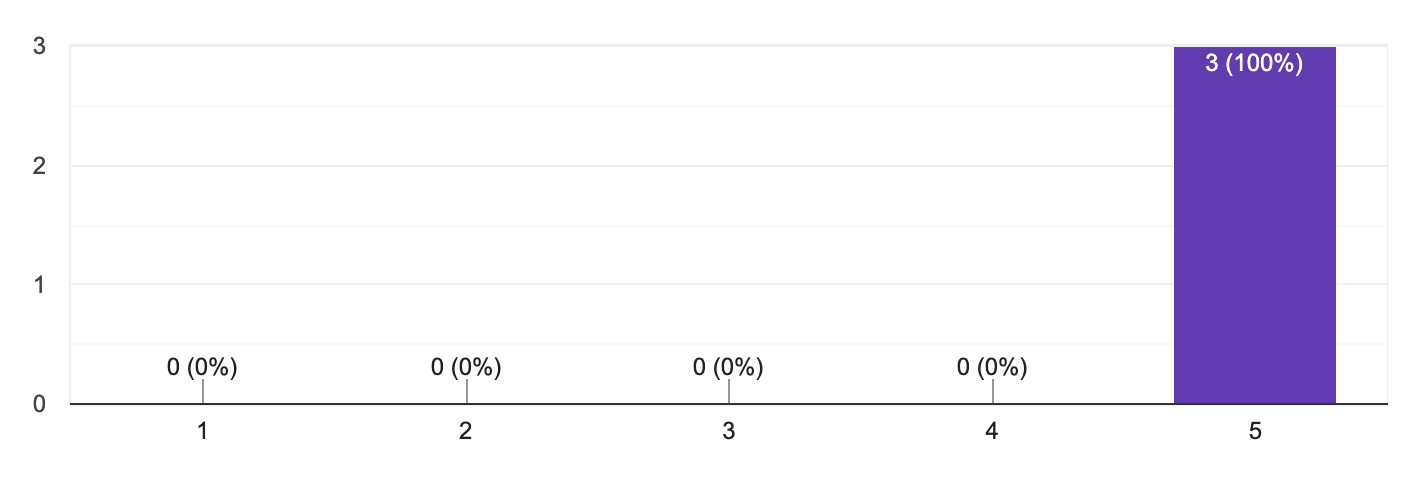

The study results indicate a largely positive reception of the slingshot mechanics. In line with the project's problem statement, the goal of this survey was not to maximize coin collection in the shortest amount of time, but rather to assess the game's intuitiveness and engagement, along with factors like cybersickness and immersion. For this reason, scores and completion times were not recorded, ensuring the focus remained on the overall user experience.
Overall, the participants found the slingshots intuitive to use, particularly the locomotion one that was rated as having "just the right" difficulty for aiming and shooting. Similarly, the game’s immersion was rated well, accounting for a good audiovisual experience. Although an uncomfortable sensation was noted by the participant with no prior VR experience, the low dizziness levels reported reinforce that the chosen slingshot locomotion method successfully avoided cybersickness, which was a key design goal. As for the interaction task, it meets its objective when considered as fun and engaging.
However, as expected, some challenges emerged with the collection and interaction slingshots. The results reflect minor range issues, which align with the known limitation of "smaller than intended" projectiles that were not finely adjusted before testing. One participant noted that: "The locomotion slingshot felt great, but the red one was harder to hit the flowers—I had to get too close to collect them."
Regarding immersion, replacing the collectible item from coins to flowers was well-received, as it better fit the initial thematic choice of projectiles being bugs. However, a small audio glitch was identified: the flower collection sound sometimes looped indefinitely, triggered when pulling the slingshot string after grabbing some flowers.
In summary, the core slingshot mechanics proved successful, while minor refinements in projectile size, interaction precision, and audio could further improve the experience.

In conclusion, this slingshot system successfully addressed the challenge of designing a VR locomotion and interaction system that is both intuitive and engaging, with no significant reports of cybersickness. Although it may seem like a simple mechanic, user feedback highlighted how applying simple physics to the virtual world can become such a satisfying experience. Throughout this project, I gained valuable skills in development for VR and 3D modelling, while working with platforms such as Unity and Krita. My perspective on VR has shifted to now recognising its potential as an accessible and immersive medium. I encountered some challenges due to the limitations of the Meta Quest for MacOS developers, which initially required significant time to tackle and to actually get to the project development phase. Overcoming these and other obstacles was at times frustrating, but also rewarding in the end. This experience also highlighted how subtle design elements can greatly influence engagement and usability. Moving forward, further refinements could improve the overall system for an even more fun experience.
• Fix small errors (like small interaction projectiles)
• Add possibility of showing projectile's trajectory trail before shooting
• Add haptic feedback (controller's vibration) while grabbing the string
• Add other features (other collectibles, more power, etc.)
I would like to thank Prof. Dr. Jan Gugenheimer and the faculty members for providing the opportunity to explore VR through an open-ended project that allowed creative design choices, making each project unique.
Thank you!
I hope you enjoyed :)

Work developed by